Recently, we had a family reunion and I made a small commemorative gift for each family.
My husband’s parents were celebrating their 40th wedding anniversary, and every single one of their children, sons-in-law, daughters-in-law, and grandchildren were there to celebrate with them!
My idea all started when my mom and I saw a bowl of antique keys in a great little antique shop in Concord, MA. We couldn’t resist buying a bunch of adorable, ornate antique keys – even though we didn’t exactly know what do to with them.
Since the 40th anniversary is the ruby anniversary, our color scheme was red, black and white – and I wanted my gift to adhere to these specifics.
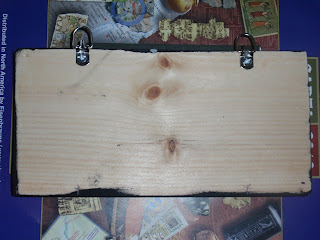
I started by purchasing a 5”x8’ board from home depot, and had my husband help me cut it into 8 pieces, each about 9” long. Then I sanded the edges.
I painted each board black, using acrylic paint, because black was one of our theme colors.
After the paint was dry, using a scrap of sandpaper, I sanded all the edges and the top of the board, to give it an antique look.
You can see the difference with this unsanded one next to this sanded one.
Once the base was done, it was time to put on the metal sheets. The black wood made a nice contrast to the silver metal, and framed it nicely. I was planning on putting vinyl lettering on the metal, so the bright silver color stood out and provided a perfect backdrop for the black vinyl lettering.
I bought these 5x7” metal sheets online from Roberts craft store(link is on the right). They are thin, and easy to cut with scissors.
I cut them in half and rounded the cut edges. Then, I sanded the top of the metal to add texture.
Using Amazing Goop glue, I glued the metal sheets down in the middle of the wooden board.
I also applied the hanging hardware. I chose hardware that screwed in to the back, and hung outside of the board so that it would be more secure on the wall. I have used those jaggedy teeth picture hangers that you nail in with little nails, but I like these a lot better – especially for something that holds any weight.
Next I chose hooks and knobs from the hardware store which would become the places to hang keys.
I spray painted them red, to match the ruby anniversary theme.
Then, I screwed the knob screws through the back at even intervals. I had to make a large hole first, and then screw in the screws quickly through the back, so they would punch all the way through the metal.
Next came adding the vinyl lettering. I am lucky enough to have an aunt with a machine that cuts vinyl letters, but there are companies who will cut customized vinyl for you. I spoke to my parents-in-law and asked them what the “key to their happiness and success in marriage” was. They each came up with one word, and I used those words for my saying.
It became “Trust and Oneness are the Keys” – a key metaphor that went along with my key holder.
Once the vinyl lettering was on, I was able to screw the knobs on, and the key holder was done!
To finish it off, I took little lengths of red cord and looped them through the antique keys, and hung them on the big middle knob.
Now, the key holders can be functional and used to hang real keys, while being a pretty decoration and meaningful reminder of our amazing family reunion.


I love the keys!!! and the rock idea. AND.. that's brilliant for your cereal boxes!
ReplyDeleteLove this one. I'm going to try it!!
ReplyDelete