Pages

April 20, 2012

Perfect Playdough Recipe


I got this recipe from the local Boys and Girls Club - so I knew it was tried and true - and it is amazing!
The dough is so soft, DOESN'T CRUMBLE, and this makes a great big batch, fast!


Perfect Playdough Recipe
Place all these ingredients in a medium sauce pan:

2 Cups Flour
1 Cup Salt
2 Tablespoons Cream of Tartar
2 Cups Water
2 Tablespoons Vegetable Oil
Food Coloring (optional)

Cook on medium heat, stirring until the dough forms a ball.
Remove from heat and knead on a hard surface.
Let cool completely before storing in a Ziplock Bag.


The Boys and Girls Club said they keep theirs for at least 2 weeks (and I imagine they use theirs almost every day).  I haven't had this batch that long yet, but it is still perfectly soft.
The great thing about playdough is that it keeps my kids entertained for hours - and the really great thing about this recipe is that it reduces the amount of playdough that is tracked around the house!  We just use our regular playdough toys with this dough, but any old cookie cutters and plastic utensils would be just as fun!

I hope you can go make a little person really happy by making them a batch :)

image signature

April 17, 2012

Framed Magnetic Board


This is one of those great ideas I found on Pinterest.  This link leads right back to the post at The Twice Remembered Cottage that describes how they did it - which is slightly different, because they built their own frame. 
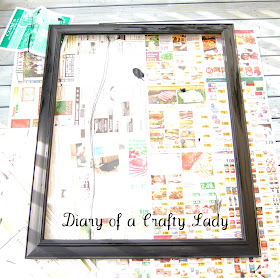
I found this guy on the side of the road on trash day :)  Huge wooden frame (In fact it had glass intact! Need to think of something to do with that...), and the foam backing was there and clean enough to reuse.

I painted the frame black, and distressed it a bit.  Then, I sprayed it with clear sealer. 


I got this giant piece of sheet metal at the hardward store, and cut it down to the right size with tin snips.  Because my frame was so big (about 2' x 3'), this piece was pretty expensive ($20, I think), but since it was the only thing I purchased for this project, I was okay with it.  Smaller pieces of sheet metal are much less expensive. 

I tore pages out of an old book.  Some of them I faux aged with a tea bag.  To do this, I got the tea bag wet, and used it like a paintbrush across the pages.  I let the pages dry overnight.  Then, I sprayed spray adhesive on the metal, small sections at a time, and set the pages down, smoothing them with a credit card type card. 
You can see how some of the pages are darker color than the others, from the tea.  I trimmed around the edge of the metal, to cut off the pages that were hanging off the edge.  I also sprayed over the pages with clear sealer - though I don't know if it needed it.  I made sure all my edges were sealed well with the spray adhesive, so I probably could have gone without the clear spray over the top.  It added spots that look perpetually wet, so I don't know if I would recommend it. 

I put the metal in the frame, along with the foam backing that came with it, in order to make it fit snug. 

Here it is with a few magnets.  I was thinking it would be fun to use to hold a reading chart in the summer, what with the book pages as a background :)

Or, it is pretty darn cute holding my daughter's rainbow princess picture...

image signature

April 10, 2012

Fabric Super-kid Cape


My daughter went to a friend's birthday party recently - and this friend just happens to be a boy (imagine that) :)  This boy loves capes, and this gave me the perfect excuse to make one for him!

I made my first cape a couple of years ago....click this link here to see it (and the instructions on how I made it!)  That was for Halloween, and it turned out really well.

I am very happy with this one too - and it is really not difficult!  This could be a beginner's sewing project.

Each side of the cape is made from 1 yard of fabric.  I like having the capes double sided - it adds fun for the wearer.  You can see the shape above, cut out from each yard of fabric.  I used a string and a pen to mark the back side of the fabric with this shape. 
If you have someone hold your string down at the middle edge of the long side of fabric, and extend your string almost to the other edge of the fabric, you can swing the string/pen in an arc to mark the even round shape of the bottom.  Same concept to mark the neck arc - just make your string much shorter.
This picture should make it a bit more clear:


You can, of course, make a cape without pictures sewn on (that would cut the time it takes WAY down).  If you like the shapes, cut them out of scraps of fabric, and zig-zag stitch around the edges to secure them onto the cape.


I often use bias tape for the neck ties - but you can make your own strips with scraps of the same fabric. 
Then, the cape is made simply pinning right sides together, with the neck ties facing in at the edges of the neck curve, and sewing all the way around the cape.  Leave a couple of inches open to turn it right side out.  Iron the cape at this point for a nice crisp look.  This time, I top stitched all the way around the edge of the cape, 1/8" from the edge, in order to secure the hole shut. 

This size, made with 1 yard of fabric, is long on my 3 year old (above), and just right for my 5 year old (below).  So, if you are making one for a 3 year old, don't use the entire 42-44" width of a yard of fabric.  This size would work for a few years older than 5 I would imagine...it certainly is long on my tall 5 year old. 


Capes are fun accessories for costumes - fun for imaginative boys and girls - and extra fun when they are personalized!  Don't be afraid to go whip up a cape for your favorite little super-kid!!

image signature