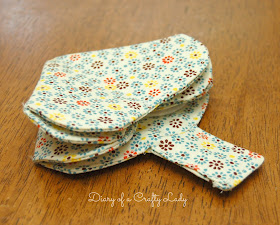
Is this thing darling, or what??
I don't know about you, but I'm always digging around in my sewing box for a needle. Ripped seam, popped button, (heaven forbid I actually have to hand sew something, but it happens. I do so love my sewing machine...).
My needles are usually on my magnetic pin cushion, but they are hard to find (insert joke about needle in a haystack) and I'd rather have the needles in their own, designated place.
I first saw one of these types of needle holders at my friend's house. She's had it for a while, and loves hers! I made myself a pattern, and it was a fun project.
To begin, click this link to find the pattern shape.
Using the larger shape, you'll need to trace and cut out 2 pieces of fabric. One of them should have fusible batting, interfacing or fusible fleece ironed to the back.
Using the smaller shape, trace and cut a piece out of felt.
Sew the two large pieces, right sides together, with 1/4 inch seam allowance. Leave a 2 inch hole along the side of the tab or opposite end for turning. Clip all the corners and curves before turning.
Turn right side out, and make sure to carefully push out all the turns. Iron nice and flat. Top stitch with 1/8" to 1/4" seam allowance. Make sure to fold under the opening you used for turning, and catch it in the top stitch, so there is no longer a hole.
Next, you need to sew the smaller, felt flower shape down.
To easily know where I was sewing the felt down, I used a disappearing ink fabric pen (or a really light pencil mark would work) and a ruler to make lines between opposite inward points (see below).
Center the felt, sew along those lines from inward point strait across to opposite inward point. Back stitch at the ends to secure.
Next, in order to make it fold properly I ironed the folds. This really helped me when trying to make that nice folded shape at the end. If you start by placing the tab up, fold the flower shape diagonally to one side and iron, and then fold it diagonally the other way and iron. It will be folded along the sewn lines when done this way.
Once everything was tucking in where it was supposed to, I ironed it again very well to reinforce the way it should fold.
For the closure, I used a sewed a small piece of Velcro to the end of the tab (again, used what I had on hand!), and the matching piece of Velcro on the other side of the holder. Then, I sewed a decorative button on the back of the tab. You could even use a functioning button with a button hole if you don't have Velcro handy...
Awesome! Now, I have this great fabric needle holder - with the needles securely in the felt, no lost needles because it folds it up into a cute little bundle for safekeeping.
This is such a quick project, you'll want to make a few for your friends. And they will love them too!

Follow me on Instagram @ diaryofacraftylady
Follow me on Facebook


