Pages

May 13, 2010

Taggy Owl - Stuffed Animal


I used a combination of this tutorial and this idea to create my own cute stuffed owl. I used the pattern from the first, but printed it on 8.5 x 11 paper - because I wanted my owls smaller.

For the one on the left, I made little taggies with scraps of fabric. (Squares, sewn right sides together on 3 sides and turned right side out)

For the one on the right, I used ribbon, folded over.

Lay the taggies along the strip of fabric, just as you want them to look. Place another piece of fabric on top of it, right sides together, and sew along the top. Then, when you flip it open, it will look like the pictures below:


Then, I sewed the eyes and the beak. I chose not to use buttons for they eyes, so that there would be no choking hazards for little kids.
My top piece looked like this when I was done:
I followed the rest of the tutorial to finish - it explains it very well.
 

Pretty cute!  Huzzah!


image signature

May 8, 2010

Metal Magnetic Hanging Boards

This blog post goes out to my mom, who made these amazingly cute, fun and functional metal magnetic hanging boards.
I sold them at a craft fair and they were a huge hit!

Originally, she made these for a stake girls camp gift, and needed quite a few.  So, her source for the metal was a place to buy them in bulk.  Ultimately, she had a few extras to give away and sell as gifts. 


Falcoln Sheet Metal in Bountiful, UT (801-298-5064) will cut the metal for you, with nice rounded edges and holes for stringing your ribbon.  The catch is that you have to buy a large metal sheet, which they cut down.  It is large enough to make about 200 of these 8"x6" sized ones.  They come out to a very economical $2 each square of metal, but you have a lot of them. 


She used the 12" square pieces of scrapbook paper, and could cover 2 pieces of metal with one sheet of paper.  Using spray adhesive she attached the paper, covering the entire board, and trimmed the edges.  She then put a smaller strip of complementing paper across the top-middle.

With a permanent ink pad, she ran it along the edges to add depth. 

Finally, she strung a pretty piece of ribbon through the holes for hanging. 
I hung mine in my bedroom with pictures of my kids on it, and later moved it to my kitchen.  I love to make magnets too, so it is a fun place to use them, other than the refrigerator. 
Plus, if you made these as gifts, it would be nice to pair it with some fun home-made magnets!


image signature

May 6, 2010

Crazy About Headbands - Shabby Fabric Edition

I am on a headband kick - and these ones are very fun and easy.


Pick a couple of fun fabrics in coordinating colors - you need the length to be about 1 yard for adult headbands. 

Make a snip about 1 - 2 inches wide, and TEAR your fabric.  It is amazing how cool this ends up looking, and how it comes out in a straight line!  If your first tear is not straight compared to your edge, make another snip and tear again.  The grain will stay the same, but may not be in line with the manufactured/cut original edge. 


Tear two pieces, different complementing colors, with one piece slightly wider than the other.
Lay them on top of eachother, so the wider one is on bottom.  If you want to taper your ends slightly, do that now with scissors.
Sew along the edge of the skinnier/top piece of fabric, leaving about 1/8" seam allowance.  Sew two or three times up each side, letting your line wave and cross to accentuate the shabby look.  I used a dark, contrasting color, because this not only keeps the pieces together, but adds a decorative element. 
Now to add flowers.  There are about a million and one tutorials for fabric flowers out there, and any number of them would look good on these headbands. 
I will show you how I made the ones in the pictures here. 
Tear a piece of fabric about 1" wide and 1 foot long. 
Tuck the end under and start to twirl the fabric in a circle. 

You can twist the strip as you go if you want, but just make a tight little pinwheel.
Then, tuck the end under, and place it on your headband.  I dont usually put it in the middle, because I like my flowers off to the side of my head.  So maybe 1/3 of the way along your headband, place the flowers. 
I dont pin them down, I just smoosh them with the presser foot of my sewing machine.  Then, again with a dark, complementing color, I sew in a spiraling circle all along the flower.
I twist and twist my headband, sewing the circle tighter and tighter, catching the layers of the twirly flower as I go.  Do this with 3 or 4 flowers, overlapping each flower a bit if you want, sewing each individually.  It ends up looking like this:

That is it!  So simple.  Tie it in a knot behind your head, and it looks so cute!!  Keep in mind, this is just a basic headband.  You can do 1, 2, 3 or more layers in your long strip... you can do giant flowers if you want, or any number of things!  Make them in every color for every outfit.  They work for the young and the old, and you always look hip!


image signature

April 27, 2010

Easy Fabric Book Cover

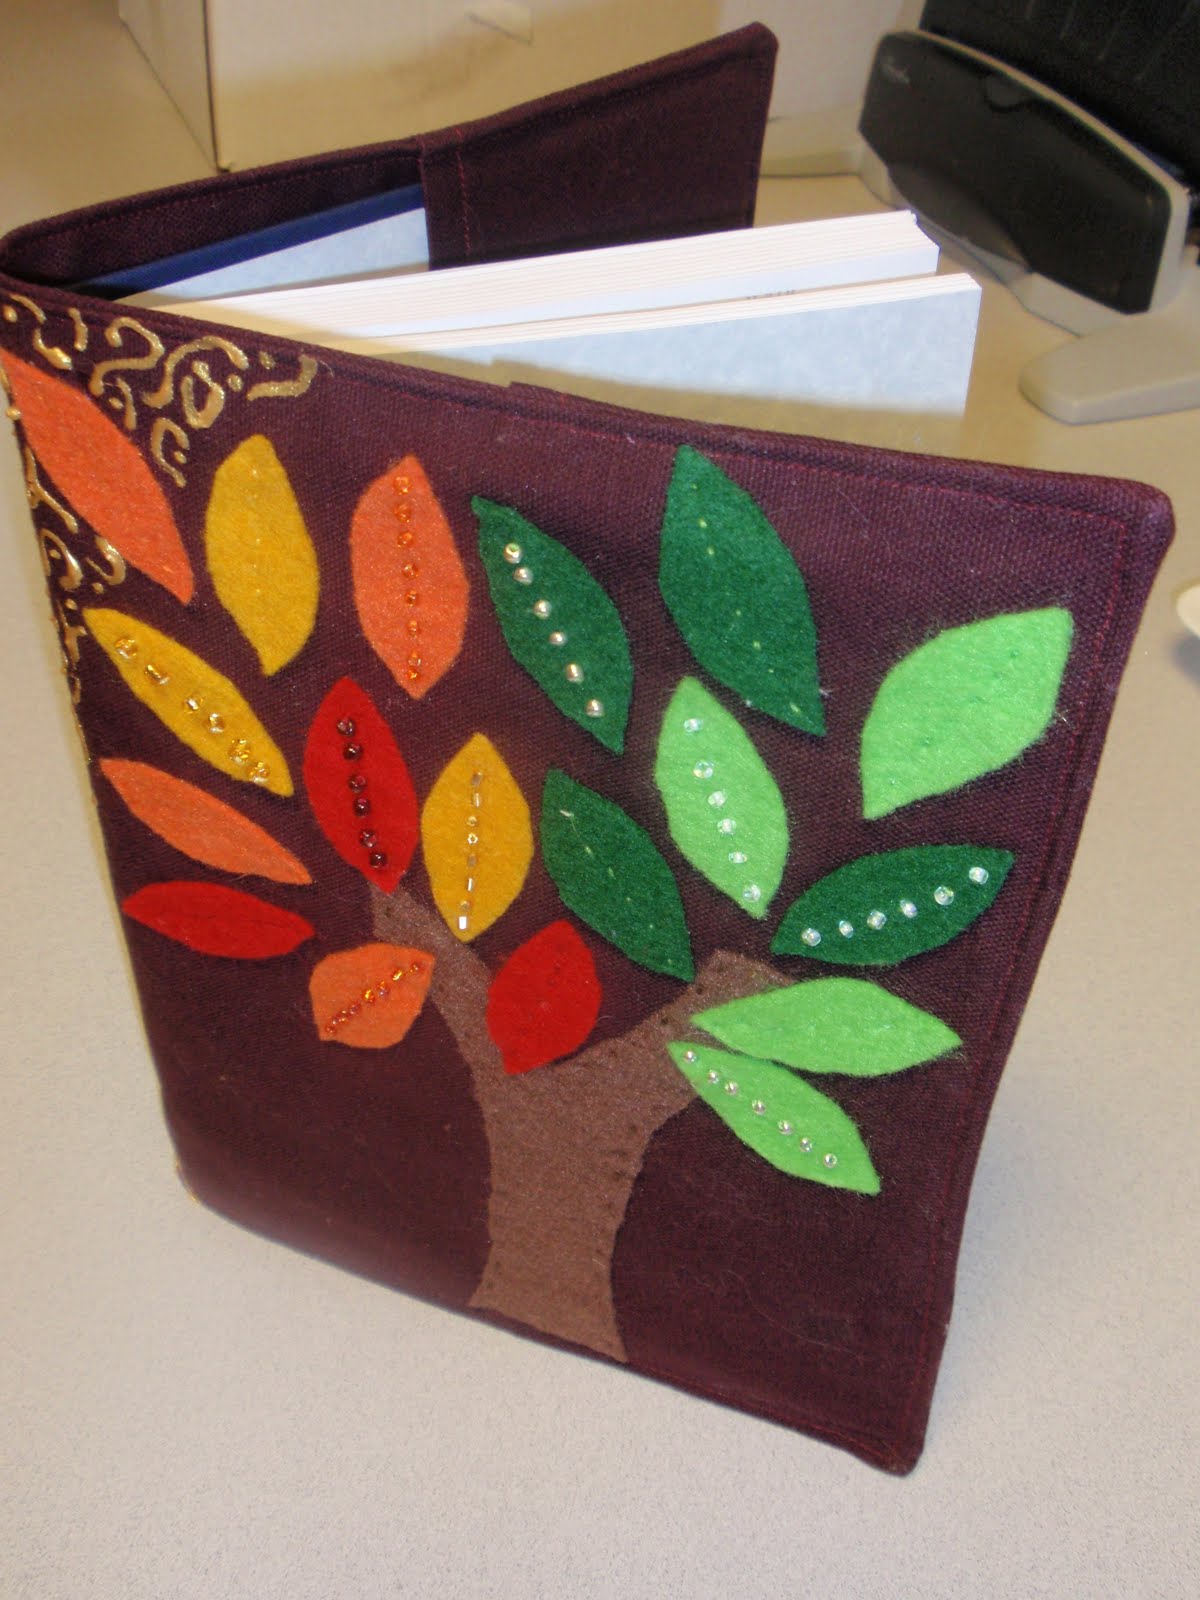
I made these covers out of a kind of fabric called "duck cloth".  It is very thick - like canvas - because these covers get decorated by parents as a surprise for their children.  So, we use thick solid colored fabric to make it easy to glue onto.  Below is a picture of one of the parent's decorations:


These would also work great with cotton fabric!

1) Start by measuring the height of the book, and the width of the book.  The width should including both covers and the spine. 


2) Your seam allowance will partially depend on how thick your fabric is.  My really thick fabric needed a 1.5" seam allowance on the width, and a 1" seam allowance on the height.  My very first try made the whole thing just barely too short, and that was frustrating.  I had only given myself 1 inch or for a seam allowance on the width. 

3)  Cut two pieces of fabric to the width x height + seam allowance dimensions. 
Then, for the pockets, cut two pieces of fabric to the same height, but only 1/2 the width of one cover. 
The picture below shows one of each of these pieces cut. 

4) Fold one long edge of each pocket under by 1/4" and sew, to remove the raw edge.


 5) Lay out your fabric by laying out one large piece, right side up.  On top of that, lay your two pocket pieces, right side up, on the far left and far right edges. 


 6) Lay your final large piece on top of that, wrong side up (so right sides are together).  Then pin around all the edges. 
 7).  Sew all the way around, with 1/4" seam allowance, leaving a 3" opening at the bottom middle to turn it right side out.

8) Turn the cover right side out.  Iron it flat - making sure the opening is tucked in. (in my picture, mine is not ironed:)  )


9)  Sew around the entire cover, an 1/8" from the edge.   
That's it!  You are done.  Slip the book into the pockets. 


image signature

April 21, 2010

Earphone Pouch - Bag without Raw Seams!

I wanted a little pouch for my ipod earphones, so that when I kept them in my purse they wouldnt get dirty or tangled. 
I have also used this concept to make larger bags for guinea pigs - so that they don't snag their toes on raw edges.  In that case, the inside fabric is fleece to keep them warm. 

I decided I wanted a bag with no seams, and it was a little complicated - so here is the tutorial:

1.  Cut 4 pieces of fabric - 2 for the outside of the bag, and 2 for the inside.  They can be all the same color, or complementing colors.  I made mine 4" x 5" for a very small pouch.  This concept would work for bigger bags as well.  For instance, my guinea pig bags were 11" wide and 13" tall when finished.


2.  Place the 2 squares of the same color right sides together.  For the fabric that will be the outside of the bag, sew along 3 sides, leaving the top open.
For the fabric that will be the inside of the bag, sew along 3 sides, but leave a 2+ inch hole in the bottom (for turning it right side out eventually) and leave the top open.  See photo below:
3.  Turn the fabric being used for the inside of the bag right side out.  Then, put it inside the other bag.  See photos:

4.  Sew around the top of the bag, so that the 2 bags are stitched together all along the top edge. 

5.  Pull out the inner bag.

6.  Pull the entire thing through the hole.  Fabric will then become right side out.  Then, stitch the hole shut, either with your sewing maching, or whip stitch by hand. 

7.  Push the inner bag into the outer bag. 


8. Fold down the top edge (if desired) and sew around it.


9. Add sew on velcro.

Finished!


image signature

I'm linking up to: