My father in law used to have a three piece alligator decoration that, when placed on the ground, would look like it was swimming through the floor.
Every couple of days he would move it around to a new place in the house, and I thought it was so clever.
When I saw these Halloween socks at the craft store, I had an idea to make witch legs that my kids could move around the house, to make it look like whatever piece of furniture they placed it under had smashed a wicked witch:) I think they turned out pretty great!
This was how I did it:
Find a pair of long Halloween tube socks.
Cut off foot, just above the heal, so that just a straight piece of sock remains.
Using the
shoe template I created here, cut out 4 shoe shapes from black fabric. Be sure to cut out 2 with the toe facing to the left, and 2 with the toe facing to the right, so that they match up properly to make shoes.
Take one shoe piece, and lay the cut edge of one sock in line with the top edge of the shoe and centered. Make marks on the shoe to indicate the width of the sock. (As shown below)
Now, there are two ways to do this. One way requires you to hand sew the "shoe laces" on at the end. The other way allows you to sew the "shoe laces" on with a machine - but makes lining up the laces a little trickier. I will show both.
Way 1: With Hand Sewn Laces
With two shoe pieces, right sides together, sew from your mark to the edge of the shoe on both sides with 1/4 inch seam allowance - as in picture below. Also sew up the line, from the inside part of the line you just sewed to the top of the shoe (that little 1/4 inch part).
With your sock right side out, tuck it inside the shoe and line up the edge of the shoe with the edge of the sock (between your sewn marks).
Pin the sock to the shoe all the way around, leaving the sock open.
Sew around the circle with 1/4 inch seam allowance. Make sure you tuck the edges of the shoe aside as you sew - so they are left poking out as shown below.
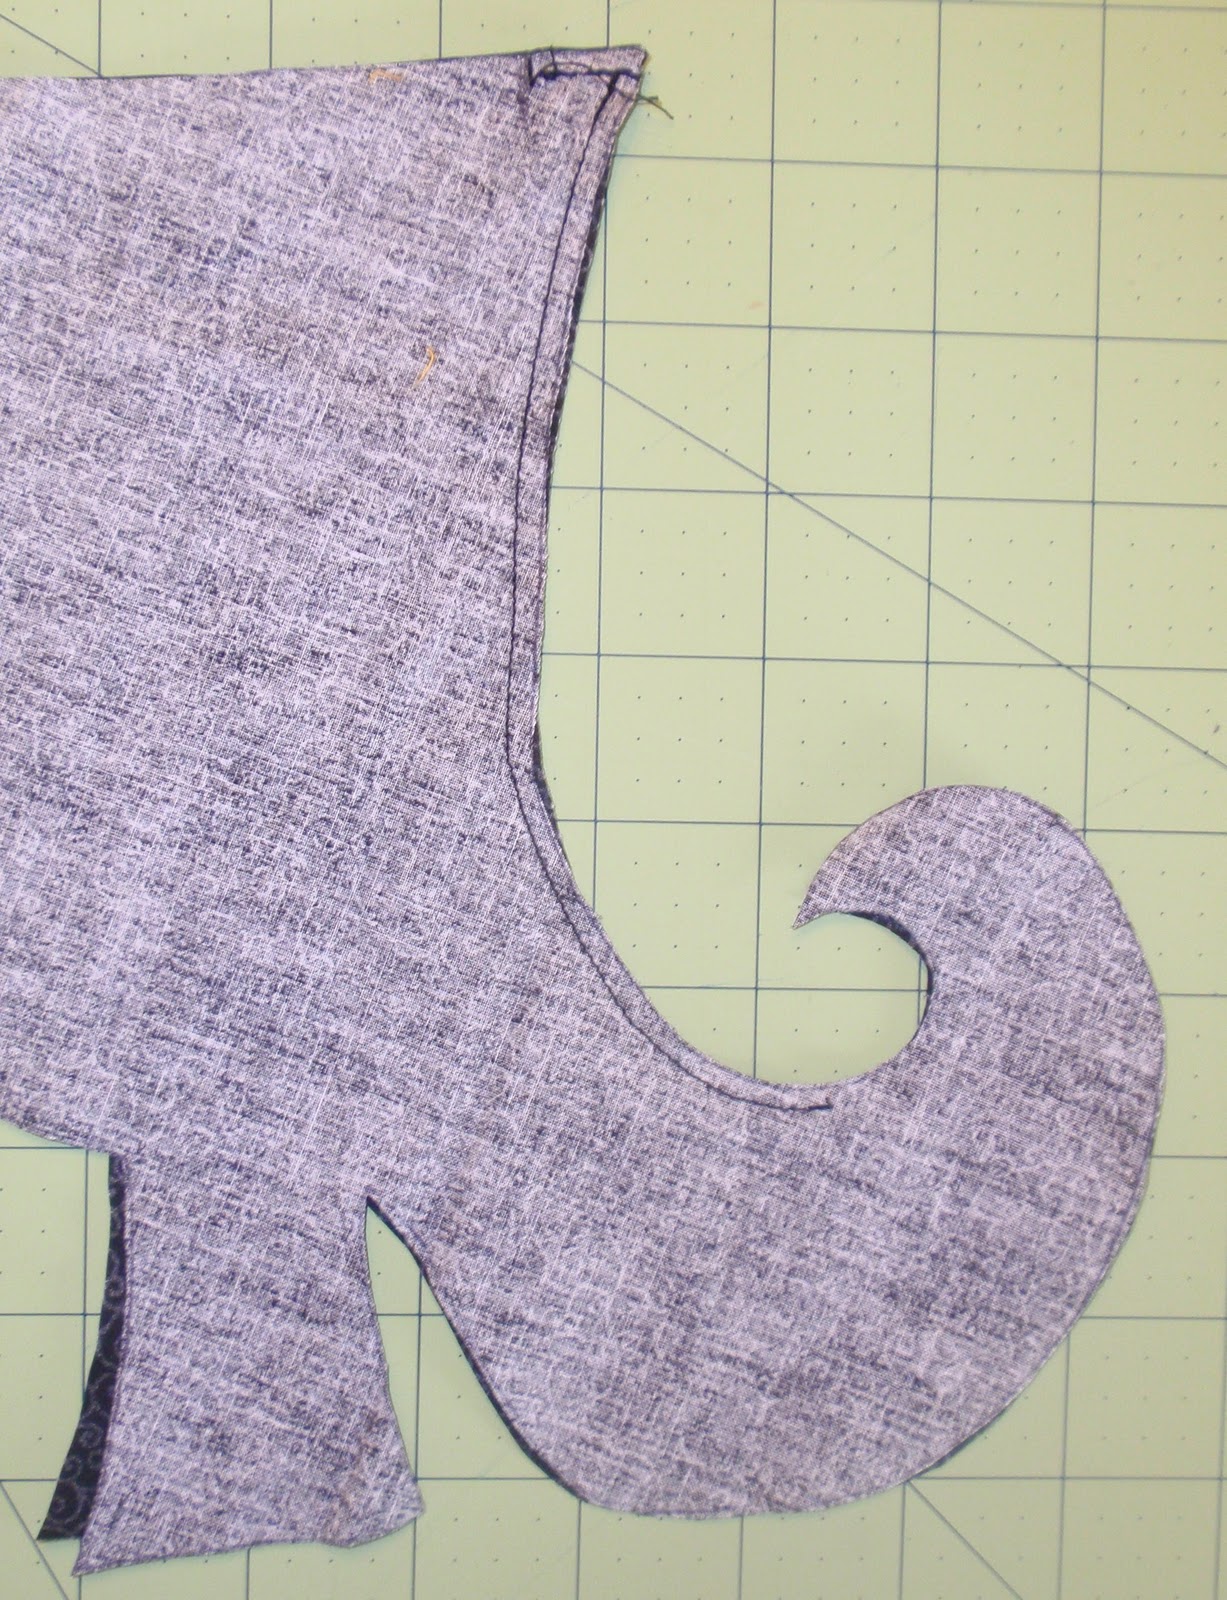
Pull the sock through itself until it is completely wrong side out and out of the shoe. Pin the two shoe pieces together and sew all the way around the shoe with 1/4 inch seam allowance.
Using the hole at the top of the sock, pull the entire sock and shoe right side out. Use an unsharpened pencil or closed scissors to carefully push out all the edges of the shoe.
Now, you need to hand sew the laces on. I used orange ribbon - cut into three small strips for laces, and then another longer strip tied into a bow. I heat sealed the edges before sewing them on.
Way 2: With Machine Sewn Laces
After you make your marks on the fabric indicating the size of the sock, put 2 pieces of shoe, right sides together. Sew from the sock mark to the edge, only on the edge facing the front of the shoe, and also sew down the front of the shoe, part way along the looping toe - as shown (1/4 inch seam allowance):
Turn the shoe right side out, and lay the sewn seam as flat as you can get it.
Leaving at least an inch or so at the top, place your ribbons along the seam, evenly spaced from side to side, and pin - as shown (remember to heat seal the edges of your ribbon):
Sew the ribbon to the shoe along the short edges of the ribbon, and near the knot of the bow.
Now sew from the mark you drew to indicate the size of the sock to the edge of the shoe on the other side. Also sew up the line you drew, that little 1/4 inch part on either side.
Then, follow steps similar to way 1.
Tuck the sock in, pin and sew around the opening.
Pull the sock through itself and pin the shoe together.
Sew around the entire shoe
Pull the shoe right side out through the top of the sock.
Now you don't have to worry about hand sewing the shoe laces - because there they are!
To Finish:
Stuff the socks and shoes with stuffing. Carefully cram bits of stuffing all the way into the toe and heal, etc.
Once they are both full of stuffing - sew the tops of the socks closed, and sew the legs to each other.
Then, put them under something and giggle at how cute they look! Happy Halloween!







.JPG)




.JPG)




.JPG)


f.jpg)
