Pages

July 27, 2014

Fold-up Fabric Needle Holder


Is this thing darling, or what??

I don't know about you, but I'm always digging around in my sewing box for a needle.  Ripped seam, popped button, (heaven forbid I actually have to hand sew something, but it happens.  I do so love my sewing machine...).

My needles are usually on my magnetic pin cushion, but they are hard to find (insert joke about needle in a haystack) and I'd rather have the needles in their own, designated place.  

I first saw one of these types of needle holders at my friend's house.  She's had it for a while, and loves hers!  I made myself a pattern, and it was a fun project.  


To begin, click this link to find the pattern shape.

Using the larger shape, you'll need to trace and cut out 2 pieces of fabric.  One of them should have fusible batting, interfacing or fusible fleece ironed to the back.

Using the smaller shape, trace and cut a piece out of felt.


Sew the two large pieces, right sides together, with 1/4 inch seam allowance.  Leave a 2 inch hole along the side of the tab or opposite end for turning.  Clip all the corners and curves before turning.


Turn right side out, and make sure to carefully push out all the turns.  Iron nice and flat.  Top stitch with 1/8" to 1/4" seam allowance.  Make sure to fold under the opening you used for turning, and catch it in the top stitch, so there is no longer a hole.


Next, you need to sew the smaller, felt flower shape down.
To easily know where I was sewing the felt down, I used a disappearing ink fabric pen (or a really light pencil mark would work) and a ruler to make lines between opposite inward points (see below).


Center the felt, sew along those lines from inward point strait across to opposite inward point.  Back stitch at the ends to secure.

Next, in order to make it fold properly I ironed the folds.  This really helped me when trying to make that nice folded shape at the end.  If you start by placing the tab up, fold the flower shape diagonally to one side and iron, and then fold it diagonally the other way and iron.  It will be folded along the sewn lines when done this way.


Then, fold it backward along the middle, as you see below, and press with your fingers.  Depending on the kind of felt you use, you may not want to iron it.  Some felt I have purchased off the roll will melt if ironed!


Once everything was tucking in where it was supposed to, I ironed it again very well to reinforce the way it should fold.

For the closure, I used a sewed a small piece of Velcro to the end of the tab (again, used what I had on hand!), and the matching piece of Velcro on the other side of the holder.  Then, I sewed a decorative button on the back of the tab.  You could even use a functioning button with a button hole if you don't have Velcro handy...


Awesome!  Now, I have this great fabric needle holder - with the needles securely in the felt, no lost needles because it folds it up into a cute little bundle for safekeeping.  
This is such a quick project, you'll want to make a few for your friends.  And they will love them too!


image signature
Follow me on Facebook


July 4, 2014

Patriotic Shabby Fabric Headbands - a very quick DIY craft


Want to add a little patriotic flair to your wardrobe?!  These shabby headbands are so fast, I whipped 2 of them up for my girls in about 10 minutes!

You really only need a few, long, skinny scraps of fabric, about 1 yard long in red, white and blue.

Make a snip about 1 - 2 inches wide on the fabric you want on the base, and TEAR your fabric.  It is amazing how cool this ends up looking, and how it comes out in a straight line!  If your first tear is not straight compared to your edge, make another snip and tear again.  The grain will stay the same, but may not be in line with the manufactured/cut original edge. 


Tear a second piece, in a different color, slightly thinner than the first.
Lay them on top of eachother, so the wider one is on bottom.  If you want to taper your ends slightly, do that now with scissors.
Sew along the edge of the skinnier/top piece of fabric, leaving about 1/8" seam allowance.  Sew two or three times up each side, letting your line wave and cross to accentuate the shabby look.  I used a dark, contrasting color to add a decorative element. 

Now to add flowers.
Tear a piece of fabric about 1" wide and 1 foot long. 
Tuck the end under and start to twirl the fabric in a circle. 

You can twist the strip as you go if you want, but just make a tight little pinwheel.
Then, tuck the end under, and place it on your headband.  I dont usually put it in the middle, because I like my flowers off to the side of my head.  So maybe 1/3 of the way along your headband, place the flowers. 
I dont pin them down, I just smoosh them with the presser foot of my sewing machine.  Then, I sew in a spiraling circle all along the flower.
I twist and twist my headband, sewing the circle tighter and tighter, catching the layers of the twirly flower as I go.  Do this with 2 - 4 flowers, overlapping each flower a bit if you want, sewing each individually.  It ends up looking like this:


That is it!  So simple.
Happy 4th of July!!


image signature

June 28, 2014

Tension Rod Puppet Theater


My middle daughter loves putting on puppet shows.  She has such an amazing imagination!  She creates scenes and characters from paper and crayons, and tapes them onto popsicle sticks to hold them up.  Her puppet shows are elaborate and her pictures are darling - it is such a treat to witness her creativity!  Usually she sits behind a chair or the couch to tell her tale.  When I saw this idea for a hanging puppet theater facade - I knew I wanted to make her one!  It hangs in a doorway or hallway with a tension rod, and is easy to put up and down.  

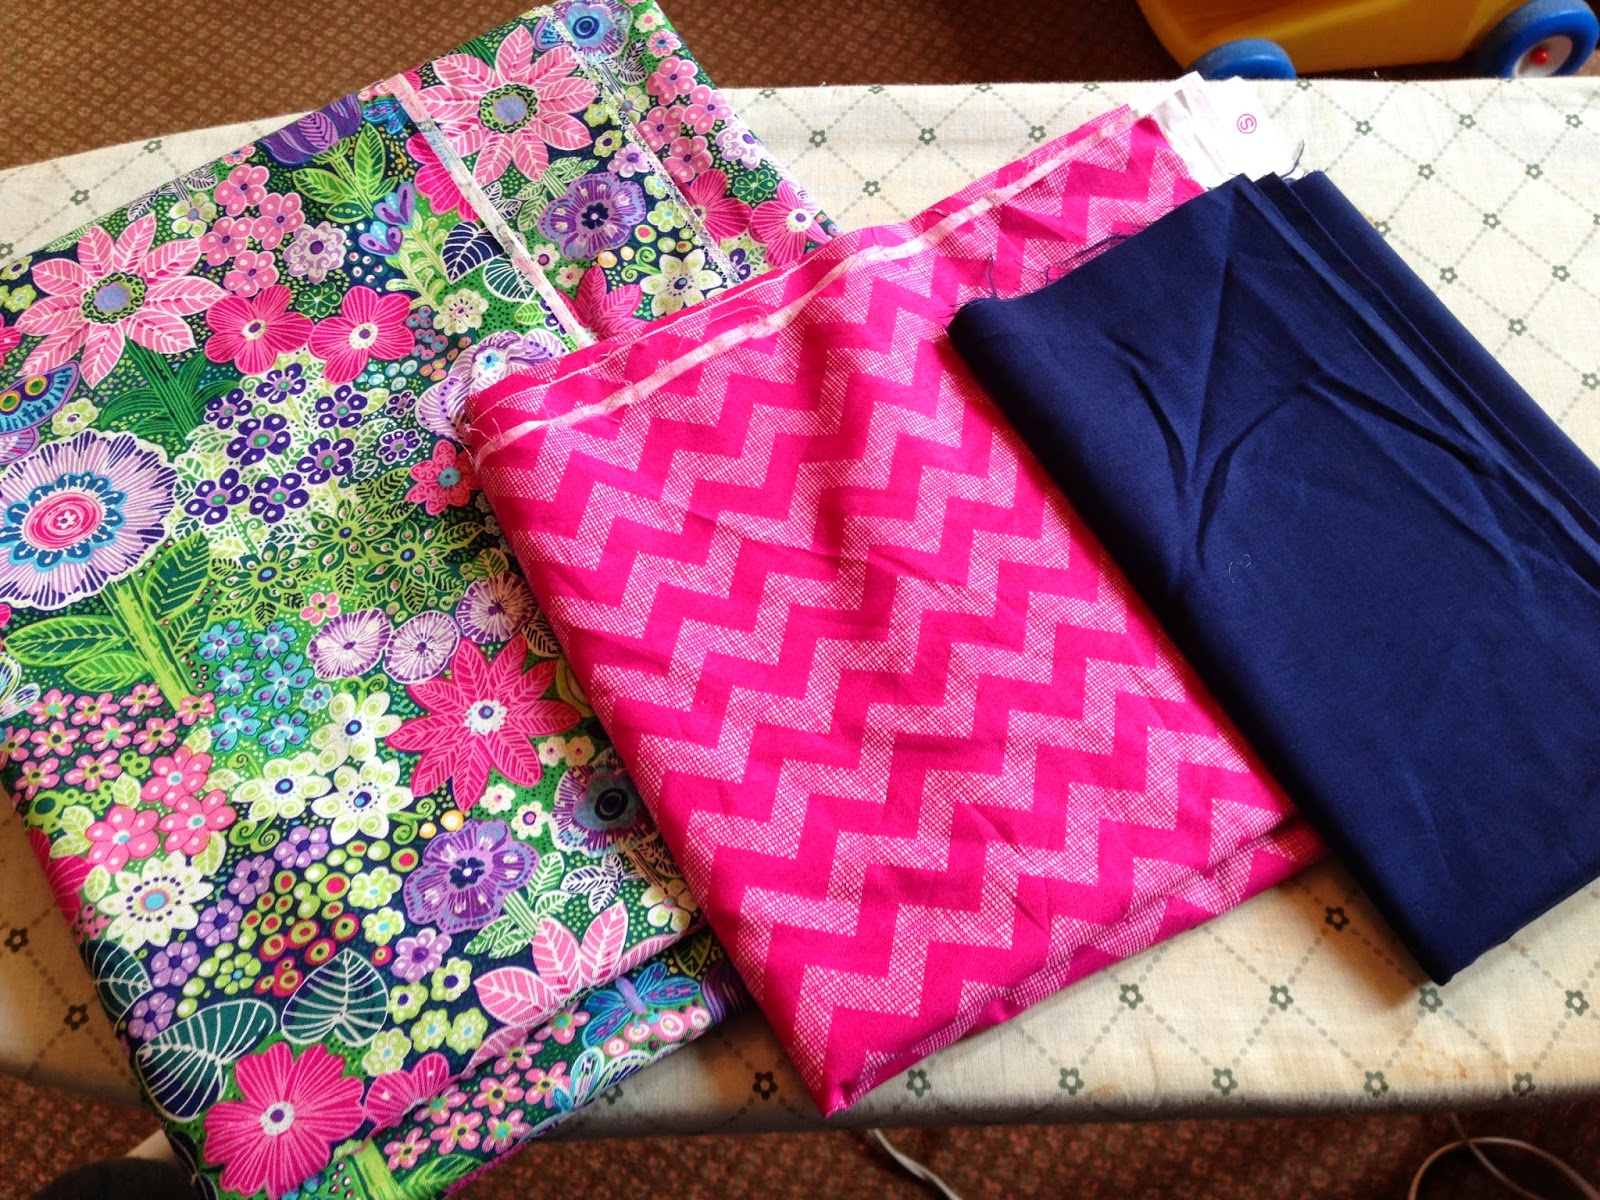
I already had a tension rod I wasn't using, so I went and picked up some fun fabric and got started.
2.5 yards of the main fabric was more than enough to fill the doorway.  3/4 yard of the pink fabric was for the curtain, and 1/2 yard of the blue fabric was for binding and bunting.  Bias tape would also work for binding.  


I cut off the selvage on the large piece of fabric, and zig-zag stitched the long raw edges to keep them from fraying.  On the top edge I folded it over once by 1/2" and ironed...

Then folded it over again by 3.5" and pinned it down.  I sewed 1/4" from the edge (the folded edge toward the middle of the fabric) and this created a sleeve for the tension rod to go through.


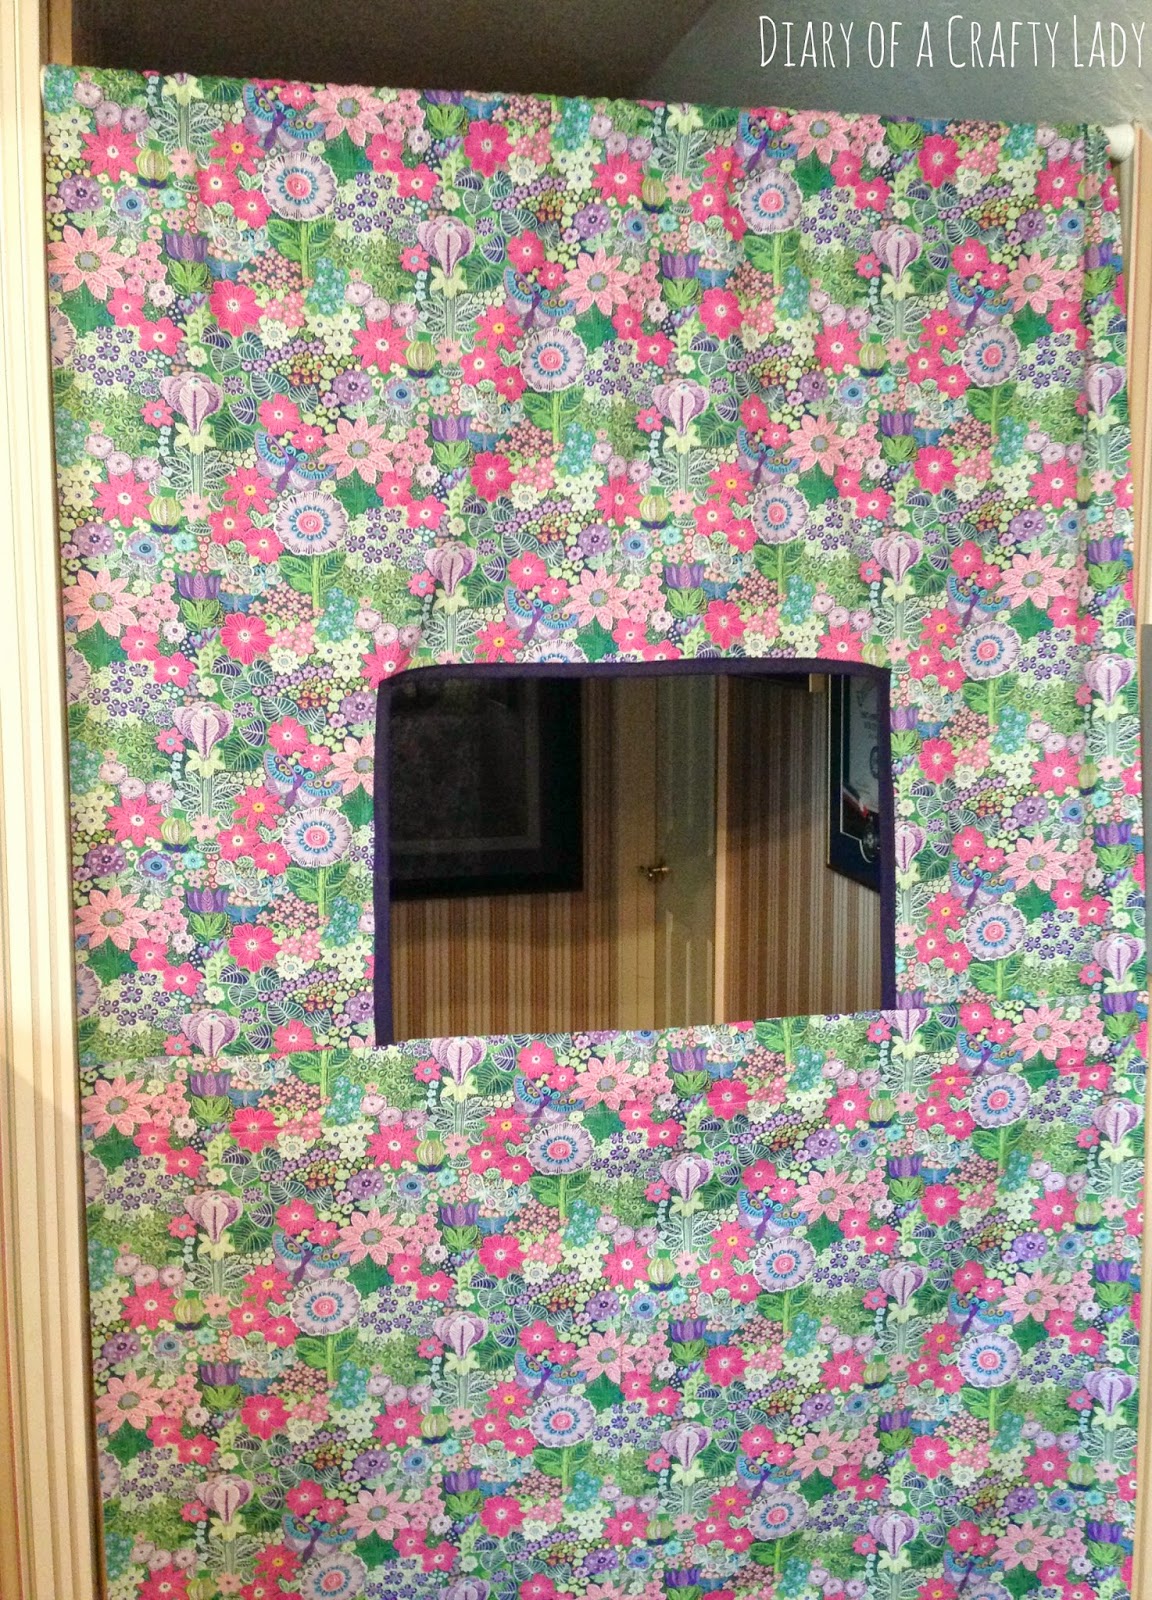
I decided where I wanted the bottom of my window, and cut the long piece of fabric off at that height.  Then, I folded that top piece of fabric in half to cut out a window right in the middle.  My window is 24" wide and 14" tall.  I used my home-made "bias tape" from the dark blue fabric to line those three raw edges.  Don't worry too much about where you put your window.  You can raise or lower the tension rod a bit if necessary.

With the remaining large piece of fabric that I cut off, I looped it just as I had the top, to create another sleeve.  I wanted a sleeve below the window so that I could put something through it to hold the bottom of the window straight.
I made the loop nice and wide at 3 inches.  Then, with right sides together, I sewed the two large pieces of fabric back together.  The piece of fabric with the window was sewn at the bottom to the remainder of the fabric with the looped edge on the top.  If you look closely at the picture below you can see what I mean.

I ended up sticking a yardstick in the sleeve, but you could use another tension rod or a dowel.  Something that will hold the middle of the fabric taught.  


To make curtains I cut the pink fabric into 2 large panels a few inches taller and collectively a few inches wider than the window.  I zig-zag stitched the edges to keep them from fraying.  I looped over the tops and sewed them to create a sleeve for a dowel, and looped over the bottoms so it would look nice.  

On the back, I sewed two tabs of fabric a few inches outside, and above, the window opening.  Through these tabs I was able to place the dowel that had the curtains hanging on it.  


This system allows the girls to open and close the curtains from the back...


On the edges of the window I sewed loops of ribbon which allow us to tie the curtains back.


Below the window I sewed a button, so that we could hang a sign from it with the title of the show!

Triangles of fabric sewn to a piece of ribbon made a quick bunting to add a little flair!

And in just a couple of hours, my little puppeteers had a theater worthy of their elaborate productions :)


It has already been really fun to listen the stories, and watch the silly shows.  My girls spend hours creating puppets and practicing their plays - which is great for these long summer days!  And another bonus - the theater folds up small and is easily put away.  No permanent structure in our small space.  


I am so happy with the way this turned out!  Even for a beginning sewer, this is a quick and satisfying project.  If your kids love putting on their own productions - this tension rod puppet theater is a must!
image signature
Follow me on Facebook


June 5, 2014

Getting those t-shirts clean with White Cloud Laundry Detergent

This post brought to you by White Cloud. All opinions are 100% mine.

Now that I've made myself a t-shirt quilt, I have family members coming out of the woodworks wanting me to make one for them ;)  Both my husband and my father-in-law have started combing through their unused t-shirts and setting them aside for me - which is actually pretty cool :)
Of course, not all the t-shirts are completely clean...(and who wants to do a project with dirty fabric, right?)

Luckily, I had White Cloud Laundry Detergent to get all those stains out!  White Cloud has a new line of laundry care products that you can get at Walmart (Store Locator) - and the 3 in 1 Micro clean technology promises to get out the tough stains.
 photo SocialMediaPress_zps6f379940.jpg
Heaven knows how long some of these t-shirts have been sitting in their drawers.  I was worried that some of these stains wouldn't come out after sitting so long.


I mean, those are serious business, am I right?


This one has something red on it!!  I was seriously skeptical about this one coming out.
In they all went, with the White Cloud detergent.  Mine was the Blooming Lavender scent, and I liked that it wasn't overwhelming, but smelled light and fresh.  Plus, this is going to sound weird, but I really liked the cap.  It didn't drip detergent over the edge of the bottle when I was screwing it back on.  It's the little things :)

The moment of truth...


Can you believe it?!  The stains are gone!  I'm so happy.  No stains on these t-shirt quilts!


Even the red came out - phew!


Pretty white shirts again.  Awesome.

Now you can try White Cloud Laundry Detergent for yourself!  Click here for a high value coupon, and be sure to Like White Cloud on FacebookFollow White Cloud on Twitter and Follow White Cloud on Pinterest.

Disclaimer: Limit one coupon per purchase on product specified.  No cash back if coupon value is higher than purchase price.  Void if reproduced, transferred, used to purchase products for resale or where prohibited/regulated by law.  Not valid on trial sizes.  Consumer pays sales tax.  Redeemable at participating retail stores.  Valid only in the U.S.


Dare to Compare White Cloud for getting your tough stains out!

Visit Sponsor's Site