Pages

October 31, 2011

Our Toy Story Family - Happy Halloween!


Well, we had a spectacular Halloween!  The girls have about 10 pounds of candy each!  We trick or treat in downtown Boston - at Beacon Hill - which is a beautiful, afluent part of town that goes all out for Halloween :)  It was a very pleasant night, and the costumes held up great!

Since we had Jessie and Buzz Lightyear, it was only fitting for Sean and I to be Toy Story characters as well. 

I made this Mrs. Potato Head costume out of felt.  The ears are stiff felt.  The "accessories" are sewn around the edges, with a little stuffing inside to make them stick out a bit.  The best part - it was warm!


Bullseye is a hoodie with felt sewn onto it.  I used the same method to sew the mane and tail that I used when sewing the dragon hoodies here
Then, I added ears, eyes, and a saddle with felt, some of it stuffed to make it 3-D as well.


We had fun together, and got lots of nice comments.  As usual, it is hard to get a good family photo - but here we all are together at a party a few nights ago. 


Happy Halloween - as Buzz would say, "To Infinity, and Beyond!"


image signature

October 29, 2011

Felt Trick-or-Treat Bag - Pizza Planet!


So, I just posted about the Etch-A-Sketch trick our treat bag that I made for Cowgirl Jessie Doll - but I hadn't quite finished with this one yet - for my younger daughter.
So, you get another felt trick or treat bag post :)  This oneis for another Toy Story Character: Buzz Lightyear!

I had some grand ideas for the design of Buzz's bag, but I needed to finish this one quickly for a Halloween party we had last night, so I made simpler embellishments - with Pizza Planet as the theme.  (For those of you who may not know, Pizza Planet is a restaurant that the characters visit in the Toy Story movie).


Pin It


Again, everything is made from felt.  I print off letters on the computer, trace them on to felt and cut around the tracing....
This time I sewed everything down.  You could use heat-n-bond, but you have to be really careful with the iron - this kind of felt made from plastic bottles will melt!!

The full tutorial for the shape of the bag can be found here.


Here is a side view - with the green stripes...

And the back of the bag - a little rocket with the Pizza Planet initials...

Buzz(ina) loves her bag - and it looks GREAT with her costume!  So, don't worry that it is only 2 days until Halloween - you still have time to make one ;)

image signature

October 27, 2011

Felt Trick-or-Treat Bag - Etch A Sketch!


Pin It

I have loved making custom trick or treat bags for my kids the past few years.
They are quick, they can be tailored to any theme, and I think they add so much to the costume :)

When my daughter decided to be Jessie from Toy Story, my awesome sister gave me the idea to make an "Etch A Sketch" bag - since Etch is another Toy Story character...brilliant!

I created the basic tutorial for this bag here - when making this "Doggie Treats" trick or treat bag last year:


With this pattern you can make any design to match your child's costume!


I used grey embroidery floss to stitch "Trick or Treat" on one side of Etch, and "Boo!" on the other side - just as it would look on a real Etch A Sketch.  The words at the top were painted on with a stencil I made with my Silhouette. 

Here is my little Jessie Doll with her trick or treat bag.  I love how it completes the whole outfit!


image signature

October 23, 2011

Cowgirl Jessie Halloween Costume


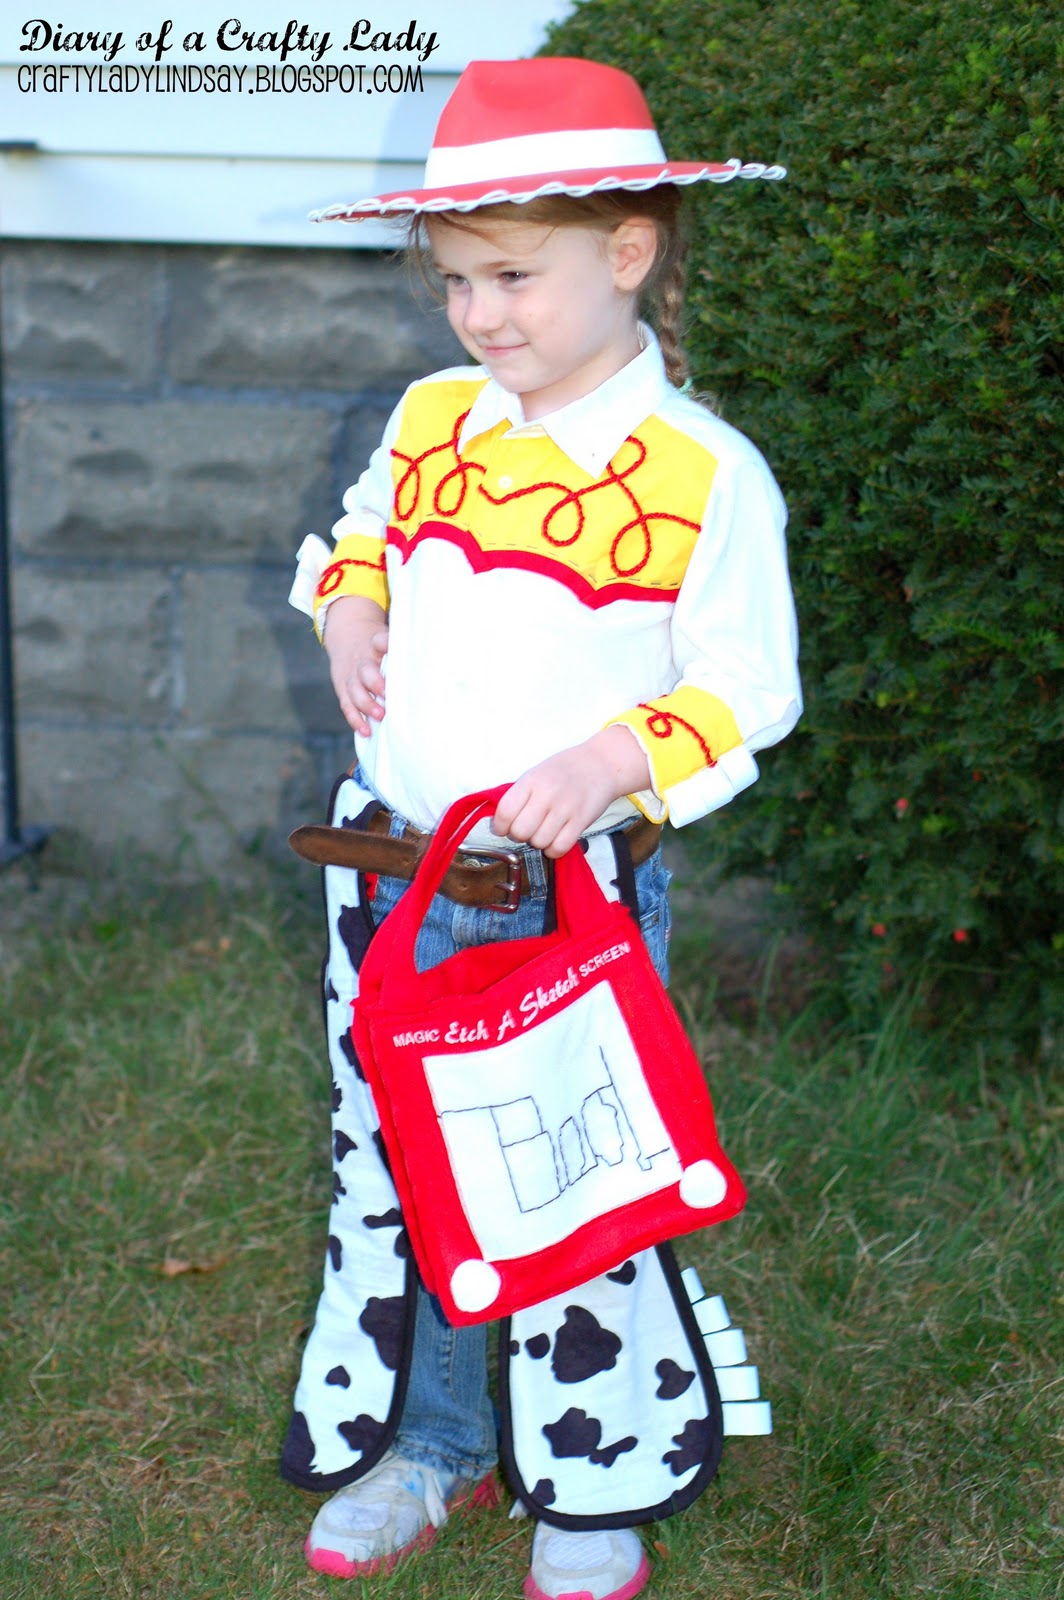
Is she a darling Jessie doll, or what?!
My daughter asked me a month or so ago if she could be Jessie, from the movie Toy Story, and I thought to myself - I could do that!

We have the collection edition Jessie doll at my house - and I used that little doll as my model to make a pretty darn good replica for my daughter's costume...


And lucky for me - she loves it!  She makes a great cowgirl!

I didn't take as many in progress pictures as I sometimes do - but here are a few quick pictures to give you an idea of how I put it all together...
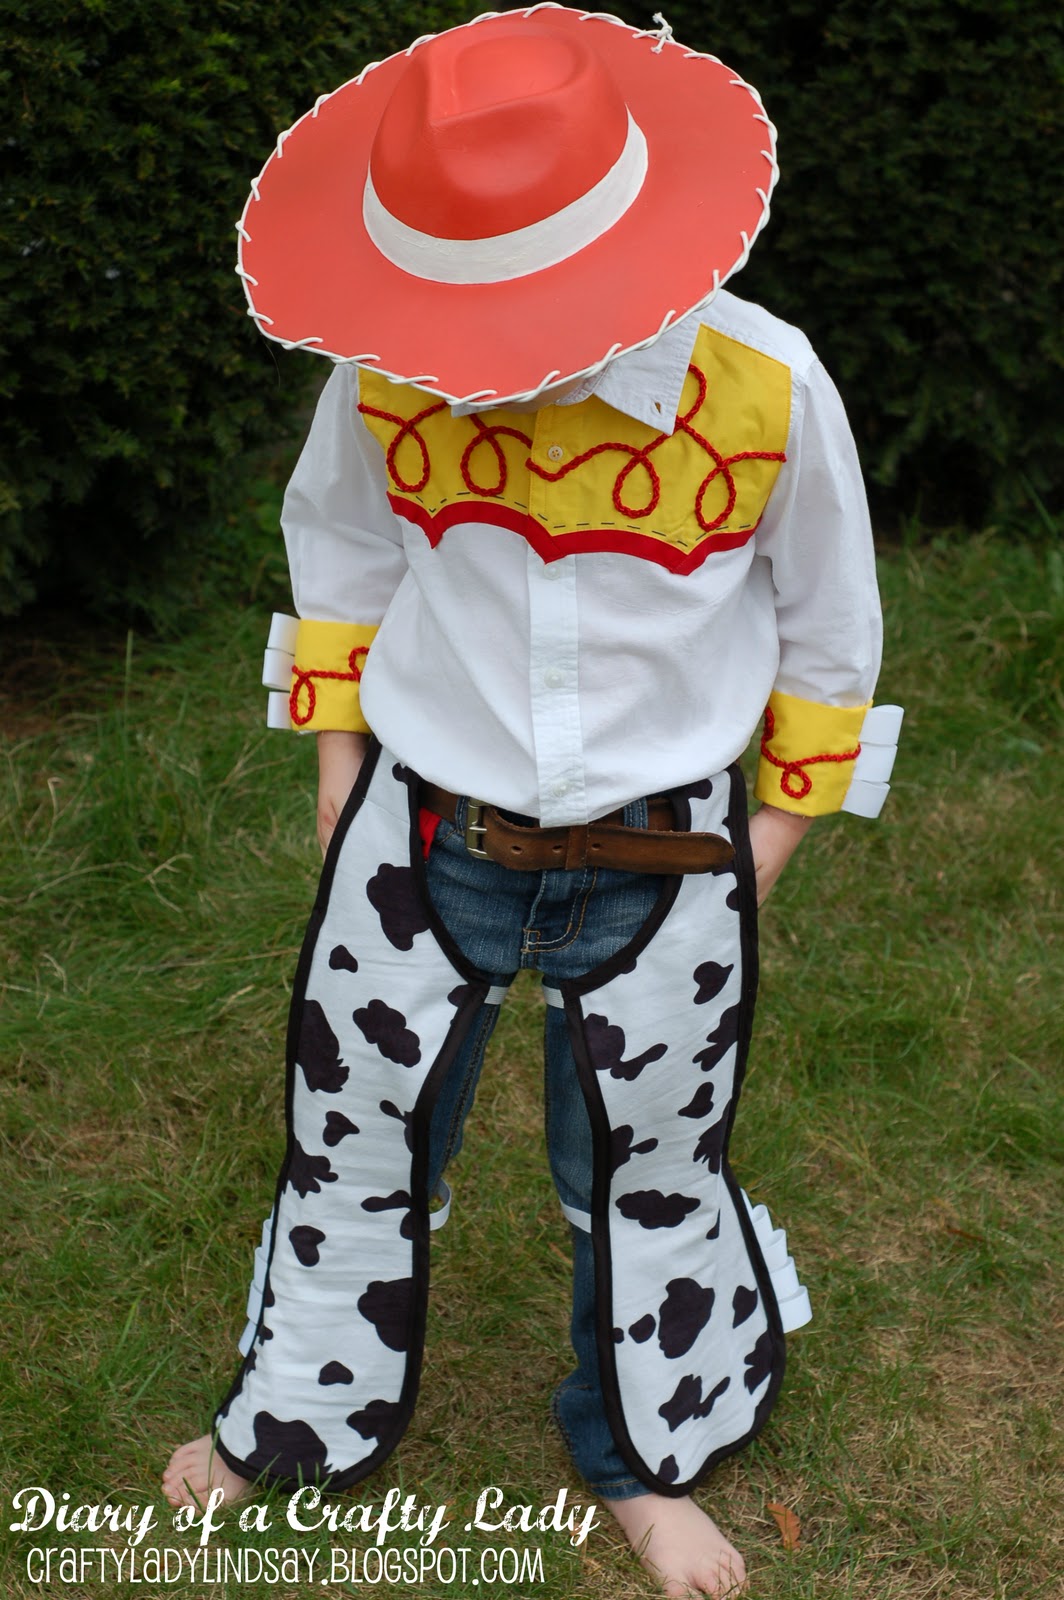
A white button up shirt from Old Navy got some yellow fabric on the top.  I cut the yellow fabric the right shape, with enough extra on the top and sides to fold it under.  The part along the buttons is folded into the shirt.  I used bias tape for the red trim.  I also used heat n' bond to hold the fabric to the shirt before I sewed all around the edges.  I had to re-cut the button hole and re-sew on the button where the yellow fabric covered. 

After tracing the swirl pattern I sewed down some pretty red ribbing that I found at the fabric store.

The cuffs were each piece of yellow fabric, folded in half lengthwise.  I measured the cuff to get the correct length of yellow fabric, and cut it double the width that I wanted so I could fold it over.

After I sewed the red ribbing on, the short ends were sewn together, right sides together, with white ribbon loops facing in.  This formed a yellow circle.

Then I pinned the raw edge of the yellow circle to the shirt cuff (yellow, inside the white shirt, wrong sides together, sewed around the cuff, and then folded the yellow over the top of the cuff.

 
Here the cuffs are, attached to the shirt:


The chaps are slightly different than the real Jessie's outfit - but I didn't want to ruin a pair of jeans by sewing through them.  So, I made my chaps so that they would be held up through the belt loops. 

I cut the shape of each leg out of the only cow fabric I could find at the fabric store, and some denim material I had leftover.  With the cow fabric and denim wrong sides together, I sewed black bias tape all the way around the edge. 
After that, I sewed on elastic at thigh level and calf level - so that they would stay wrapped around the legs.  I also sewed the white ribbon loops on at the bottom.  Finally, I folded over the top part to make a loop that the belt would thread through.


This hat is foam - from the craft store.  I spray painted it red, painted the white strip around the middle with acrylic paint, and hot glued the white ribbing around the edge.

I also punched holes all around the edge to loop the white ribbing through...

Finally, I hot glued some hair combs onto the inside of the hat.  I needed a way for the hat to stay on my daughter's head - and they worked great!

My daughter was very involved in the supervision of her costume :)  She insisted on a pull string in the back, just like the real Jessie doll...clever girl.  (She even counted the number of white ribbon loops I put on the chaps to make sure I had put the right number on!)
The pull string is a little bracelet from her play clothes box, attached to the loop in the back of her shirt with a string.

Look at those cute cowgirls!  Whew!  I am glad to have this done in time for Halloween.  And I even made her a coordinating trick or treat bag
Now, I just have to figure out costumes for the rest of our family! :)
Pin It


image signature
Follow me on Facebook


October 16, 2011

Halloween Countdown Block Calendar


I just made a really cool costume for my daughter (pictures to come), and every day now, she has been asking how many more days until Halloween - because she can't wait to wear it!
After about 5 days of explaining how many days there were left, I decided that I had better make her a Halloween Countdown Calendar...


I think you can find these unfinished wooden kits at the craft store - but mine actually came from the Kid's Workshop that they do the first Saturday of every month at Home Depot.  If you have kids - I definitely recommend trying out the workshop!  It is free, and out of the house, and they can paint and glue and hammer to their heart's content (without you having to clean up!)...

I painted mine with acrylic paint, and sanded the edges to distress it.  I also glued on the wire and bats to add some height and make it more Halloweeny :)


The wording and numbers are made from vinyl - and if you are making your own block countdown calendar, it is good to know that with only 2 blocks you have to put the numbers in a very specific order!  One block has the numbers 012357 and the other block has the numbers 012468 (and the 6 becomes a 9 when flipped upside down). 


Besides being a really cute Halloween decoration, it is helping my daughter visually learn the progression of time and days, and she loves finding the right numbers each day :)


We can't wait for Halloween!
image signature


October 13, 2011

Fall Stick Wreath


Well, I am starting to catch the wreath fever :)  It seems like wreaths are pretty much a staple of every craft blog - and I have had an itch to make a fall one for my house.
When I saw this pin on pinterest - I loved the simplicity, the earthiness, and the low price tag!  I also knew exactly where to get a bunch of straight long sticks - the apple orchard!


New England has great apple orchards, and my kids love picking up the sticks from the ground.  This year, I employed them to find as many as they could for me, and I ended up leaving with an armful of beautiful straight sticks.


I followed the tutorial at The Painted Hive Blog, and added a few burlap and fabric rosettes around the middle with a hot glue gun.  The whole thing was made with a hot glue gun - and I love it because it is fast!

It was so big, because even though I cut my sticks to approximately the same length, I kept them so long that I hung my first wreath on the outside of my house.  It looks really great on my porch!

I had enough sticks leftover to make a smaller one for my door...

For this one, I glued dried and flattened leaves that I have collected from years past around the middle, and hung the words "Happy Harvest" which I had cut out of paper and distressed with ink...


Seriously, this project cost me almost nothing (even the "wreath form" was made out of a cardboard box!) - and I love how it makes the house feel instantly more festive.  I definitely suggest making one :)
Happy Wreath Making!

image signature


Visit thecsiproject.com