


Its' time to play ketchup on my blog posting. I've finished a few quilts that I've been so excited to show you - it's just taken me forever to get outside (aka: get my husband to hold them up for me) to take a picture ;)
This is one of my favorite antique quilt tops. But it started out a little less charming...

Check out that pink! This one required a little vision. I don't always spend so much time on these quilt tops. Sometimes repairs need to be made, but I have not often disassembled the whole top like I did this one. But I really was not feeling the pink. The blocks were gorgeous though, and for such a reasonable price, I went ahead and snatched this one up!

My first step was seam ripping each block out of that pink sashing. Nice, mindless work to do in front of the TV. It left me with this beautiful stack of blocks you see above. I then spent quite some time reinforcing all the loose seams, and fixing tears, and occasionally patching some holes. With so many different fabrics and tiny blocks in each quilt square, this process took a fair amount of time. The blocks were all hand sewn by some lovely person back in the day, so it wasn't surprising that so much repair needed to be done.

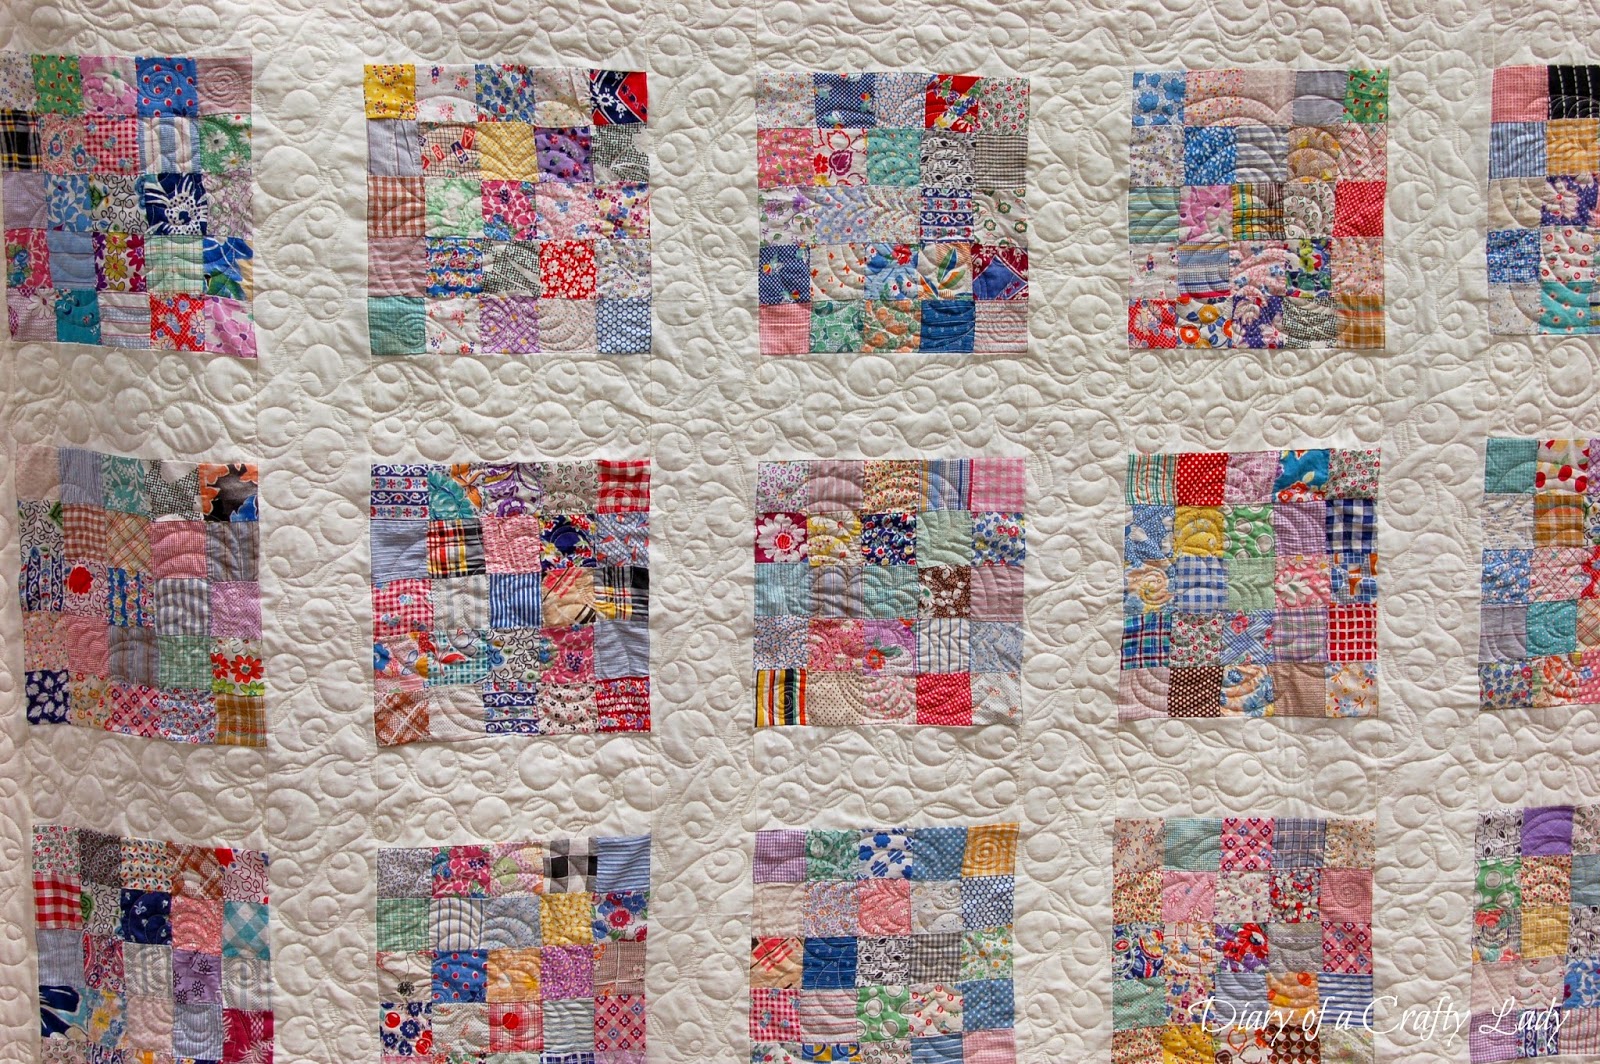
I love the look of natural colored muslin in an antique quilt top. It really lets the colors of the blocks take center stage. So, I picked up some muslin, and simply added a 4" sashing back in between all the blocks. Above you can see part way through the process.

Then, I had to wait a while to quilt it, because I love to use my mom's long arm quilting machine, but I have to wait until I go visit her. I've had a lot of fun (and agonizing) picking patterns that I want to try to free hand quilt onto my finished quilt tops.

I did a big loopy flower design on each block, and a twirly, leafy vine on the sashing.

I stay up late each night I visit working on quilts, and it is really fun to see it all come together so nicely! Even for a beginner like me, the long arm machine makes the quilt look so well finished! I love it!

I went for a bold red backing this time. I've been wanting a red back on a quilt for a while, and this one seemed perfect for it.

I used an on offwhite fabric with red seed shapes for the binding. You can see my process for binding a quilt by hand if you click here.
.

I was really worried about the red backing bleeding in the wash though, so I bought this product online called Synthrapol. It worked great to keep my white fabric white. I also threw 3 color catcher sheets in the washing machine (found those at Walmart). Can't be too careful, right?? ;)

And now I have one of my favorite finished quilts so far! The vintage fabrics and colors are so sweet. The white is fresh and clean. The quilting is tight, and after the wash it is nice and crinkly. I absolutely love it!

I know I've said it before, but quilting is addicting. So stay tuned, because I have more :)

Follow me on Instagram @ diaryofacraftylady
Follow me on Facebook


f.jpg)
