Pages

February 6, 2014

Finished Zig Zag Scrap Quilt


This summer, I finished my first ever quilt!  At least, I finished the top ;)  Once it was quilted it took me a while to finish the binding - and so here I am finally posting about my scrappy zig zag quilt...


I know there are many of you out there, just like me, saving all those little tiny scraps of fabric - knowing that some day you will find a use for them.  Am I right??  They are impossible to manage in the fabric bin, but it is amazing how often I'll find a use for a strip of fabric here or there.
Well, at some point, when you've accumulated more scraps than you can handle, try making one of these stash buster zig zag quilts!!  Each piece of fabric is only a couple inches wide and a few inches long, so you can really utilize those tiny scraps!

January 23, 2014

Valentines Day Burlap and Fabric Heart Banner


Isn't red an awesome color??
I'm still very much in love with my old red door, and after I took down my Christmas decorations, I wanted to keep it out....
Solution: give it a little Valentines Day love!

January 20, 2014

Please Remove Your Shoes Sign made with Stir Sticks


Are you ready for a really EASY, SIMPLE and CHEAP way to make yourself a wooden sign??  You can, of course, write anything you want - fun for your child's bedroom doorknob, inside a wreath on your front door, hanging in the kitchen...

My friend asked me to whip her up a quick sign for her front door.  She has three young children, and wanted a polite way to notify people before they came in that they prefer no shoes on in the house.

Instead of making a sign out of thicker, heavier wood, I started looking around my house for something I could use that would be lightweight (and free)!


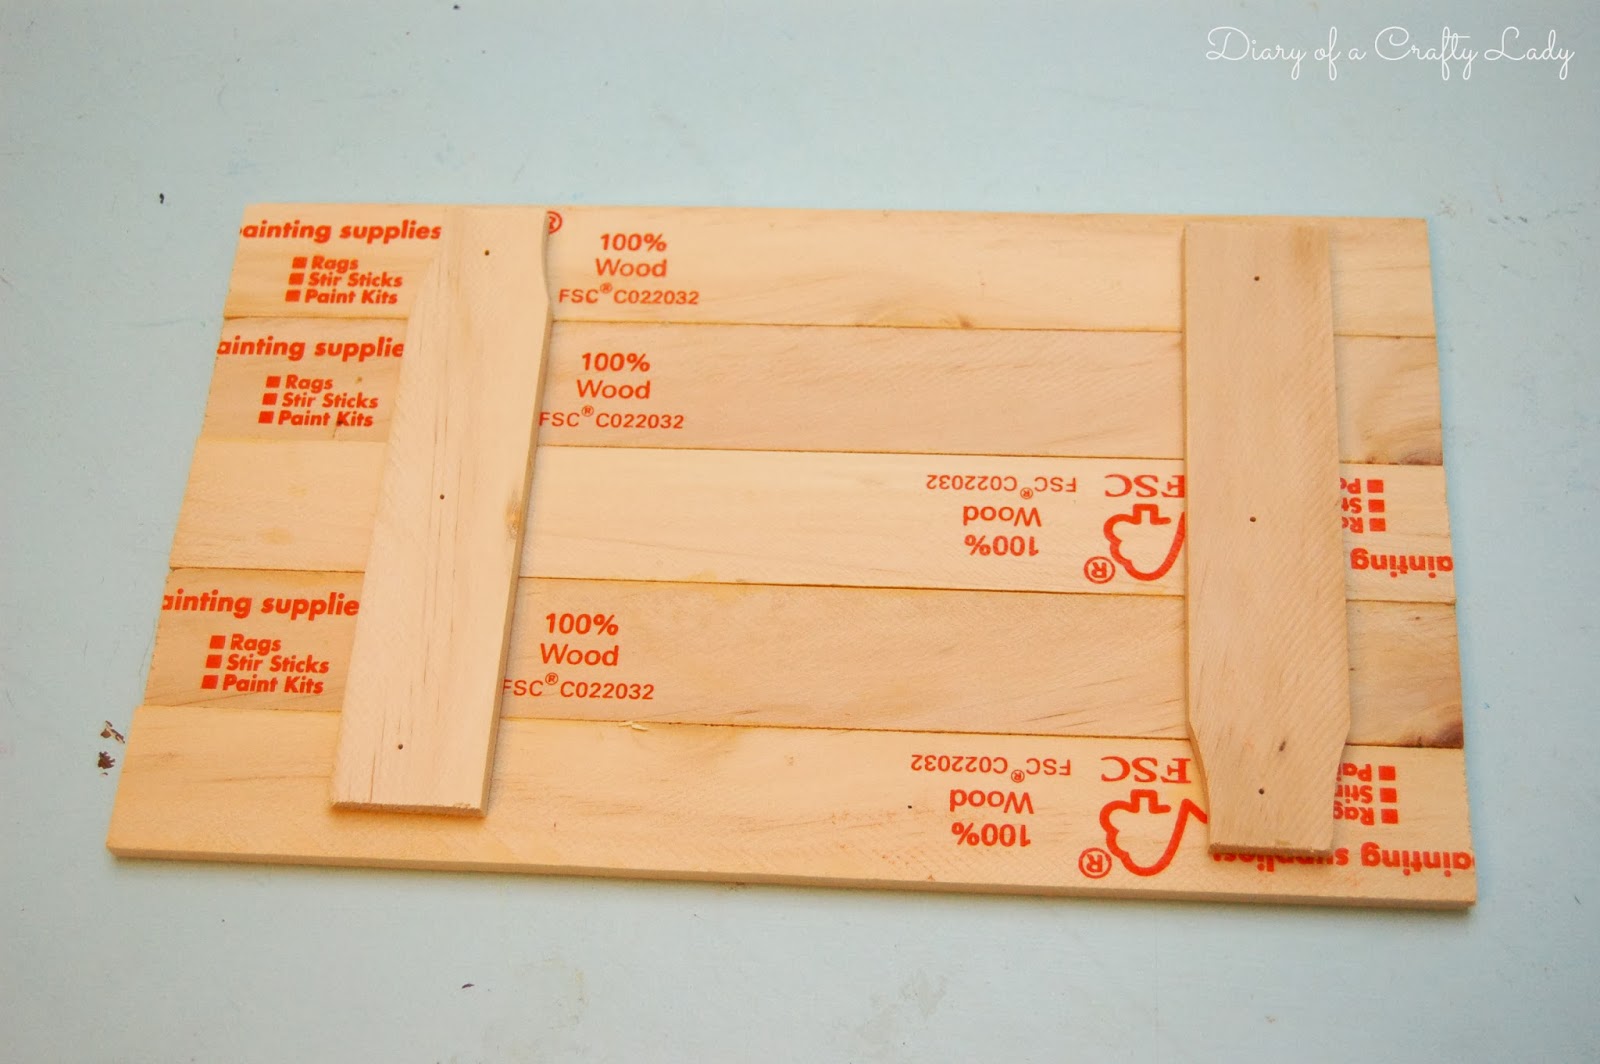
These large wooden stir sticks - available at your local hardware store - were just the ticket!

I cut mine down to 12" long, and 5 side by side like this makes it about 7" tall.


With the stir sticks face down, I applied a very thin layer of wood glue in between each stick (on that little narrow edge) and pressed them tightly together.
Then, I used the a couple pieces just under 7" as the cross pieces, and glued those onto the back.  While it was drying, to hold it all tightly together, I hammered in a few little nails just partway.  I didn't have any nails short enough that they wouldn't poke through.  Once it was dry I simply pulled the nails out.  Wood glue is SO strong when it dries, there's no need to keep the nails!
If I had had staples for my staple gun that were short enough, I would have used those to hold the sticks together while the glue dried - but I didn't :)


I gave the front a white wash with watered down white acrylic paint...


Then, I sanded the edges and stenciled on the saying my friend wanted.  

Cute little sign, ready for their front door!


I'm already thinking about what other little signs I want to make - this was so fun!

image signature
Follow me on Facebook


January 17, 2014

Time Lapse Month by Month Baby Pictures


Like what you see on DOACL?  Come follow me in Instagram!


My sweet baby turned 1 a few months ago.  During her first year of life I actually remembered (thanks to multiple calendar reminders) to take a picture on each month birthday!  I printed off a new word bubble each month that said her age, and tried to take each picture in the same place, with a different outfit :)  
I love the time lapse pics all in one big collage - it is crazy to see how much babies change in 1 year!  
I'm not sure exactly what I'll do with these pictures yet, but I'm so glad that I took them.  My older daughters wish they had some like it :)


You can also check out my "photography" Pinterest board, where I have even more baby photo ideas!


image signature
Follow me on Facebook


January 14, 2014

Our Winter Themed Birthday Party


Like what you see on DOACL?  Follow me on Instagram!


Having daughters is so wonderful!  Some of my favorite things to do with them are craft and play and watch them grow and be excited about new things.  As much as I want them to stay babies forever, my oldest daughter is growing up to be one of the most helpful, thoughtful and kind kids I have ever met.  This year, she and I had a lot of fun planning her 7th birthday party together - and she picked a winter theme!
Over the past couple years we have thrown a Pirate Party and an Art Party, and they were great!  I have learned a few things about throwing a party for kids, and I am feeling much more confident that I can plan games, food and activities that they are sure to enjoy.

For our invitations, we made colorful mittens with all the info on the inside, tied together with string.


First, I cut strips of colorful magazine pages, and my daughter used Mod Podge to glue the strips side by side onto a piece of cardstock.  


On the back of each page I traced 4 mitten shapes.  2 mittens per invitation, so you can get 2 invitations per page.

Once they were cut out, I punched a hole in the top corner of each, wrote a little rhyme on one mitten, and the party specifics on the other.

Finally, I tied the two mittens together with a string, and they fit into a colorful card envelope. 

Most of our winter party centered around snowmen.  
One of the crafts we had the kids do was make these easy wooden snowman decorations to take home.  The kids loved sanding, painting and gluing!

January 6, 2014

BYU Football Smash Book


How is your New Year going??  I hope you are feeling energized and ready to tackle your resolutions, for those of you who make them.  (Despite this bitter cold most of the U.S. is experiencing!)

I love the idea of writing things down and keeping records.  I have been an off and on journal keeper since I was a young kid.  It is a blast for me to look through photo albums, school papers, scrapbooks, journals, baby books...and I am always so proud of myself when I actually sit down and take the time to write.

For Christmas this year, I decided to make a journal smash type book for my aunt and uncle who are huge BYU football fans!  I mean, they have season tickets - and they don't even live in Utah!  They brave weather, crowds, traveling long distances - all for their beloved Cougars :)  And I wanted to help them remember their football fan adventures.

This would also be a great project for those of you who have a resolution to keep a journal or write down snippets of some aspect of your life this year.

So, here's a look at a bit of their book.

December 28, 2013

Superhero Hoop Art


Superheros Rock - and my two nephews particularly love superheros.  They were superheros for Halloween, they have superhero bedsheets, and now they have some cool superhero artwork for their room!

I had a great time making hoop art for them for Christmas, and here's a quick explanation on how I made these guys...

I purchased three 7" wood embroidery hoops from the craft store for a couple dollars each.  
I wanted the hoops to have color to frame the artwork, so I wrapped each in a bright, superhero color using the following method.

1) Cut a strip of fabric a little over 2" wide (you might need to adjust the width if your hoops are bigger/smaller) and just make sure the strip is plenty long to wrap around the hoop.  Fold over the starting short edge by 1/4" and hot glue it down (see pic below)

2) You will wrap only the outer hoop - so begin at the opening - where the hardware is.  Glue the raw edge pretty close to the top inner edge of the hoop.  


3) Hot glue all the way around the inner edge until you get back to the opening at the top.  Trim your length of fabric so that you have a 1/4" overlap that you can fold under to remove the raw edge.  Hot glue it down.  Do not overlap the fabric ends.  You want to leave that opening with no fabric covering it.  

4) Wrap the strip of fabric all the way around the outside of the hoop, pulling it tight toward the inside.  Hot glue the strip down on the inside edge (you will be hot gluing directly over the hot glue line used to secure the first edge).  Try to use a thin, even line of glue.  

Once you go all the way around, it will look like the picture below.  (Ignore the white part of the fabric below.  I should not have used the selvedge edge of the fabric!  And neither should you ;) )

5) Once the outside of each of your hoop has a fabric wrap around it, you might need to make the inner hoop smaller.  Because of the bulk of the fabric, I could no longer fit the inner hoop inside.  I simply used scissors to snip out a small piece of the inner hoop (between 1/4" and 1/2") and then hot glued the hoop back together.  

Now you can make some fun superhero artwork!  

My first was made using freezer paper stencils on plain white fabric.  I happened to cut these stencils with my Silhouette, but you could use any type of stencil - even handmade.  You could also simply find superhero fabric that you like and stretch that inside the frame.  
Below, you can see partway through the process.  I layered each section of stencil, used different bright colored acrylic paint, and was able to get the right size, with just the words and layout that I wanted.


Below, it is all stretched inside the embroidery hoop and tightened.  Boom!
Make sure the metal hardware is at the top, because it can be hung from a nail right at that spot - easy!

To finish off the back, I cut a circle of white felt, just a hair smaller than my hoop, and hot glued all around the edge to cover the back of the fabric.  

My second hoop was simply different colored fabric sewn together, a little ric-rac trim, a cape shape cutout, and some freehand stitching.  I did use my sewing machine, and my free-motion quilting foot.  You could definitely embroider some words by hand.  There are lots of great "superhero" quotes and I had a hard time picking one.  I decided to go with the simple "A superhero sleeps here" phrase...


My last hoop is probably my favorite.  I stumbled upon the Wee Little Stitches shop and fell in love!  They have a ton of different character patterns, and the cross stitch is simple enough, even for a beginner.  It was fairly quick work, and fits perfectly inside the little embroidery hoop.  If you really like it, this particular pattern is free!


The great thing about hoop art is that it is funky, and can be anything you imagine!  Use fabric, use patches, use embroidery or cross stitch, make it giant or tiny...
Miss matched styles and sizes are fun - especially when you pair a few of them together in one space.  


Make your little superhero buddy really happy with his (or her) own, personalized hoop art!  
Hope you enjoy!


image signature
Follow me on Facebook


December 22, 2013

Love Note Pallet Art


My husband and I just celebrated a milestone anniversary - 10 years!  I can hardly believe it.  I'm such a lucky woman!  We have such a fun time together, and I am so blessed to have him!


Since our anniversary is so close to Christmas, I usually like to give him a hand made gift - something a little different than the purchased gifts that are often under the tree.  I enjoy the sweet gesture that spending time making a gift gives.  So, this year, I decided to make a pallet art love note to hang in our bedroom.  Pretty simple, but I love the weathered look.


This frame was yet another side-of-the-road find.  Nice and big, with a really rustic wood feel.  There was still a picture inside, so I ripped that out, and had a nice big blank frame to use for my project...


I cut up some really cheap wood so that it would fit in the frame with a bit of overlap in the back.
Then, I stained/painted it and tried to make it match the color of the frame a bit more.


After the wood was painted, roughed up, sanded, and looking nice and shabby, I attached it to the back of the frame.

First I put down a line of wood glue, then I set each of the boards face down inside the natural groove of the frame.  Below you can see a picture of the back.

Then, I nailed through the boards into the edge of the frame so that it was all tightly held together.  You could totally do this with a smaller frame, and use wooden stir sticks, or some other reclaimed wood.  It's also great because you can use a frame that doesn't have glass.


Below, you can see what it looks like from the front.


I made myself a stencil and carefully dabbed white paint to create the words.  My vinyl was not sticking well to the stained wood, so it was a little tricky.  Overall, I think the imperfections add to the charm ;)


I took a little time figuring out how to make it all rhyme - which makes it fun to read out loud.  I love the simplicity of the stenciled letters, and the sweet message.  It a fun reminder on the wall every day of how important my sweetheart is to me.


What about you??  Do you like to make anniversary gifts too?  
I'd love to hear about your hand made gifts!  

image signature
Follow me on Facebook