Pages

December 3, 2015

Uncommon Goods - Your new favorite gift giving site!

Hello friends!  Now that we are in the midst of the gift giving season, I have to ask you --
have you visited Uncommon Goods???

If not, you are going to love me.  This site is fabulous.  It is the best collection of quirky, fun, unique, useful gifts I've seen.  

If you’re looking for a gift that will spark your child’s imagination, and keep them occupied for hours – check out the kid’s section by clicking here.  I swear, I want every single item there!
This mechanical music box looks fun!  And the OgoBild below would keep my kids occupied for a long time, I have no doubt.   
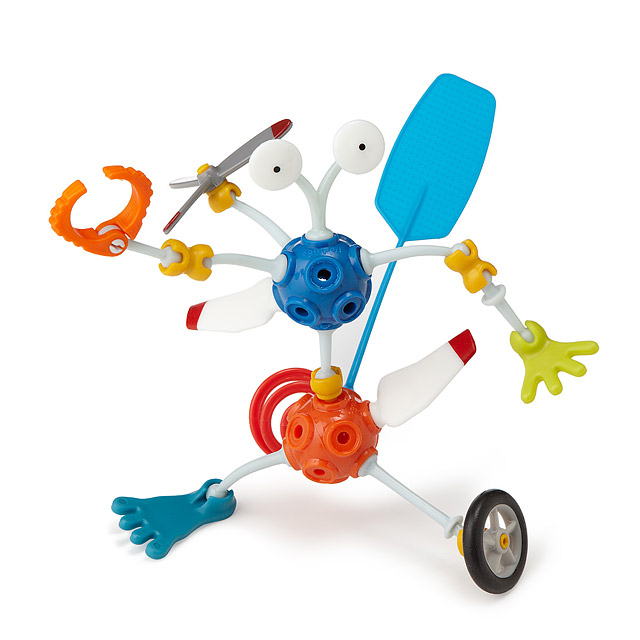

There are tons of craft and art projects - which is right up my daughter's alley.  And maybe I'd say that the stop motion animation kit was for my girls, but I think it would really be for me - it looks so fun!

And how about that ever elusive gift idea for the teen in your life?  I’m telling you, if I was a teenager, I’d want my presents coming from here ;)  There are so many cool, unique things to choose from!!  


 Drumstick pens.  I think yes.  Or these iPhone charger stickers.  Funny!
 And here is one of those quirky and useful gifts.  A ball jar amplifier speaker.


Seriously, I am having so much fun browsing their stock.  As if you need one more website to get sucked into.  But I’m telling you, this one will get the creative juices flowing, and have you even more excited about gift giving.  
Some of my favorites are the really quirky stuff.  You can even search specifically in the geek section here :)

 Tube Wringer anyone?  Or these Shower Squids?  Seriously useful for the pool or vacation!
 I love clocks.  And this one is geekily awesome.  
 And believe it or not, I think I found my husband's Christmas gift.  He loves grilled cheese.  He usually uses a frying pan - but this utensil is actually MADE for cheese grilling!  I can't believe it.  
And you still have plenty of time to order for before the winter holidays.  Use their useful sorting tools to narrow down your search, and have fun!

The amazing thing about Uncommon Goods is that many items have a designer story with it.  You can see the talent behind these amazing items and celebrate the artists who work hard to create them.  And Uncommon Goods has a great story behind their brand.  This is the kind of company you can feel good about supporting – which means a lot these days!  They think about sustainability, being fair to artists, and giving back to the community.  Awesome!

And for me? I'm thinking about some jewelry from here ;)

Then again, this handcrafted hanging planter is gorgeous!

Oh boy, decisions, decisions!

image signature

Compensation received for this post, but all opinions are my own.  
Follow me on Instagram @ diaryofacraftylady
Follow me on Facebook

November 1, 2015

Happy Halloween 2015: Peter Pan


Happy Halloween!
For several years, my oldest daughter has been the mastermind behind our family themed Halloween costumes.
We've been a Harry Potter theme, Super Mario Brothers, Toy Story, and more!

This year, she decided on a Peter Pan theme - and we got everyone involved.  Even the dog!!


The three older girls were Wendy, John, and Michael.  They were so cute.  For Wendy and John, I got clothes from Goodwill and modified them.  A blue nightgown taken in for Wendy, plus blue ribbon for the waist and hair.


John was a large men's shirt, with the sides taken in, and the sleeves shortened.  The glasses were from the dress up box, and luckily, the craft store had a foam top hat!  I think this costume might have been my favorite ;)  With the trick or treat bag and umbrella (which we ended up using on rainy Halloween night) she really looked like John!


Little Michael with his teddy bear was very easy.  I purchased pink footy pajamas and sewed a matching square of fleece on the backside.  A couple of buttons held the flap up, and that was it!
My toddler has really curly hair, so we slicked it back and pinned it to look a little more like Michael.  She had a great time, and was nice and warm ;)


Click here to see how I made their trick-or-treat bags.  That's another thing I do every year, and I'm always happy I did.


Grandma and Grandpa got in on the fun, and played the bad guys!  Hook and Smee were hilarious.  Aren't they good sports?!  And my good friend made this Hook costume.  Amazing detail!!


My husband and I went dressed as Peter Pan and Peter Pan's shadow.  He loved wearing that morph suit cap ;)  The tunic, belt, dagger and hat were all made from felt.  I used a tutorial I found at Make It, Love It for the hat and dagger.  The tunic was just two shirt shapes sewn together, front and back.  Be ware though - felt does not stretch!!  So, when making felt costumes, add several inches when compared to a t-shirt to accommodate the fact that there is no stretching.


Sweet little baby (she's just turning 5 months old!) was Tinker Bell!  The same friend who made the Hook costume made this dress.  She was so generous to let us borrow them (and saved me tons of work).  I made a little felt cover for a beanie to look like a blonde tinker bell bun.  I literally cut and hot glued felt until it looked right.  I covered up some loose edges with the ribbon in the middle, and folded it over at the bottom for a nice rim.  For a few minutes of work, it did the job!


The wings were the wire hanger and tights variety.  Make It, Love It has a tutorial for those also, which is helpful.  I added some glitter glue, and they were very cute.  


And the star of the show was the grandparent's great big Newfoundland dog who played NANA!  I took white fabric and sewed a square for a kerchief.  I gathered the middle a bit, and sewed a large piece of blue ribbon to the kerchief which allowed me to tie it around his gigantic head, and he looked great!  He walked with us on Halloween night, and that was really fun.  


These little Darling children... I love them!
Hope your Halloween was safe and fun!


image signature
Follow me on Facebook


October 19, 2015

Review: Chalkola Chalk Markers

Here is a fun product to try!  I received these Chalkola Chalk markers, and I have been having so much fun with them!  The colors are bright, so they stand out really well.  They are like paint pens, so the writing is very easy and fluid.  And the best part: the chalk writing is SO easy to clean up!

Have you ever wanted to write on a window or mirror?  These markers are awesome for writing on glass!  My daughter just turned 3, and it's a tradition in our family to write notes for each other and hang them up around the house.  With these pens, I wrote her little love notes all over the bathroom mirror, and it was so fun!  Once it's dry, you can touch it and it doesn't smear.  And all it takes to clean up is water.  It's amazing!


One of the first things I considered doing with these was writing on the car windows.  I always wondered what people used to write "Just Married!" or "State Champion Volleyball Team!" or something like that on their car windows ;) These Neon window markers are perfect for stuff like that.
I thought it would be silly to write "Honk, I turn 3 years old today" on my car for my daughter ;)


Because the chalk paint doesn't wipe off once it's dry, I even used these to decorate the outside of a ball jar that I had put goodies into for friends.  It's perfect for delivering a personalized gift, but then they can easily wash it off when they're done, and have a perfectly good ball jar to use.  Win-win!


If you want to check out more about Chalkola Markers, visit their website at http://www.chalkola.com/.  Their cute video gives you more great ways to use them.  Seriously, the possibilities are endless.  

Do you want to try them for yourself?  
You can get 20% off at Amazon.com using the code; CHALK20A


image signature
Disclaimer: chalk makers received for an honest review.  
Follow me on Facebook


October 14, 2015

Peter Pan Felt Trick-or-Treat Bags


Our family theme for Halloween this year is Peter Pan - and of course, I had to make felt trick-or-treat bags to go along with!

Making these bags each year has become a tradition, and they are a ton of fun to make.
The three older girls will be Wendy, John and Michael - and since their costumes are fairly simple, I feel like these bags are really going to add a lot to make them recognizable.


These bags are really very simple to make - and so inexpensive, because they're made from felt!

The full tutorial, and tips and tricks from all my past years can be found at the following previous blog posts:

Doggie Treats Bag - With Tutorial
Frozen Halloween Bags
Harry Potter Halloween Bags
Toy Story Halloween Bag 1
Toy Story Halloween Bag 2
Super Mario Brothers Halloween Bags


When I make these bags, I draw out a pattern on scratch paper, and then cut out felt based on my pattern.  Above you can see my template for Michael's teddy bear.
Below is the treasure map that John and Michael play with at the beginning of the Disney movie.
I sew each piece of felt down with coordinating thread.


For Wendy I made a story book, and above you can see the start of Neverland for the back of the bag.  


I did books for Hermione's bag when were were all Harry Potter characters, and my daughter insisted that Wendy have The Adventures of Peter Pan.  Simply sewing black lines on the white felt makes it look like book pages from the side.   And I used a stencil I had cut with my Silhouette to paint the words.


I always like to sew the decorations on my bags, but you certainly could glue the felt on.  I did use glue to secure the tiny pieces, like the fire, the mermaid tail, and the sails in the picture of Neverland, below.

For John's bag, the map, above is pretty recognizable, and I love the bright colors on the white background.  For the back of the bag, I made a feather, like John wears later in the movie.  


And what would Michael be without his trusty teddy bear?!  Rather than have my 3 year old carry a real teddy bear and try to deal with that on Halloween, this is the only thing she'll have to carry, and it completes her costume, as well as holds her candy.  Perfect!

What are your kids going to be for Halloween?  Are you getting ready?

image signature
Follow me on Facebook


May 19, 2015

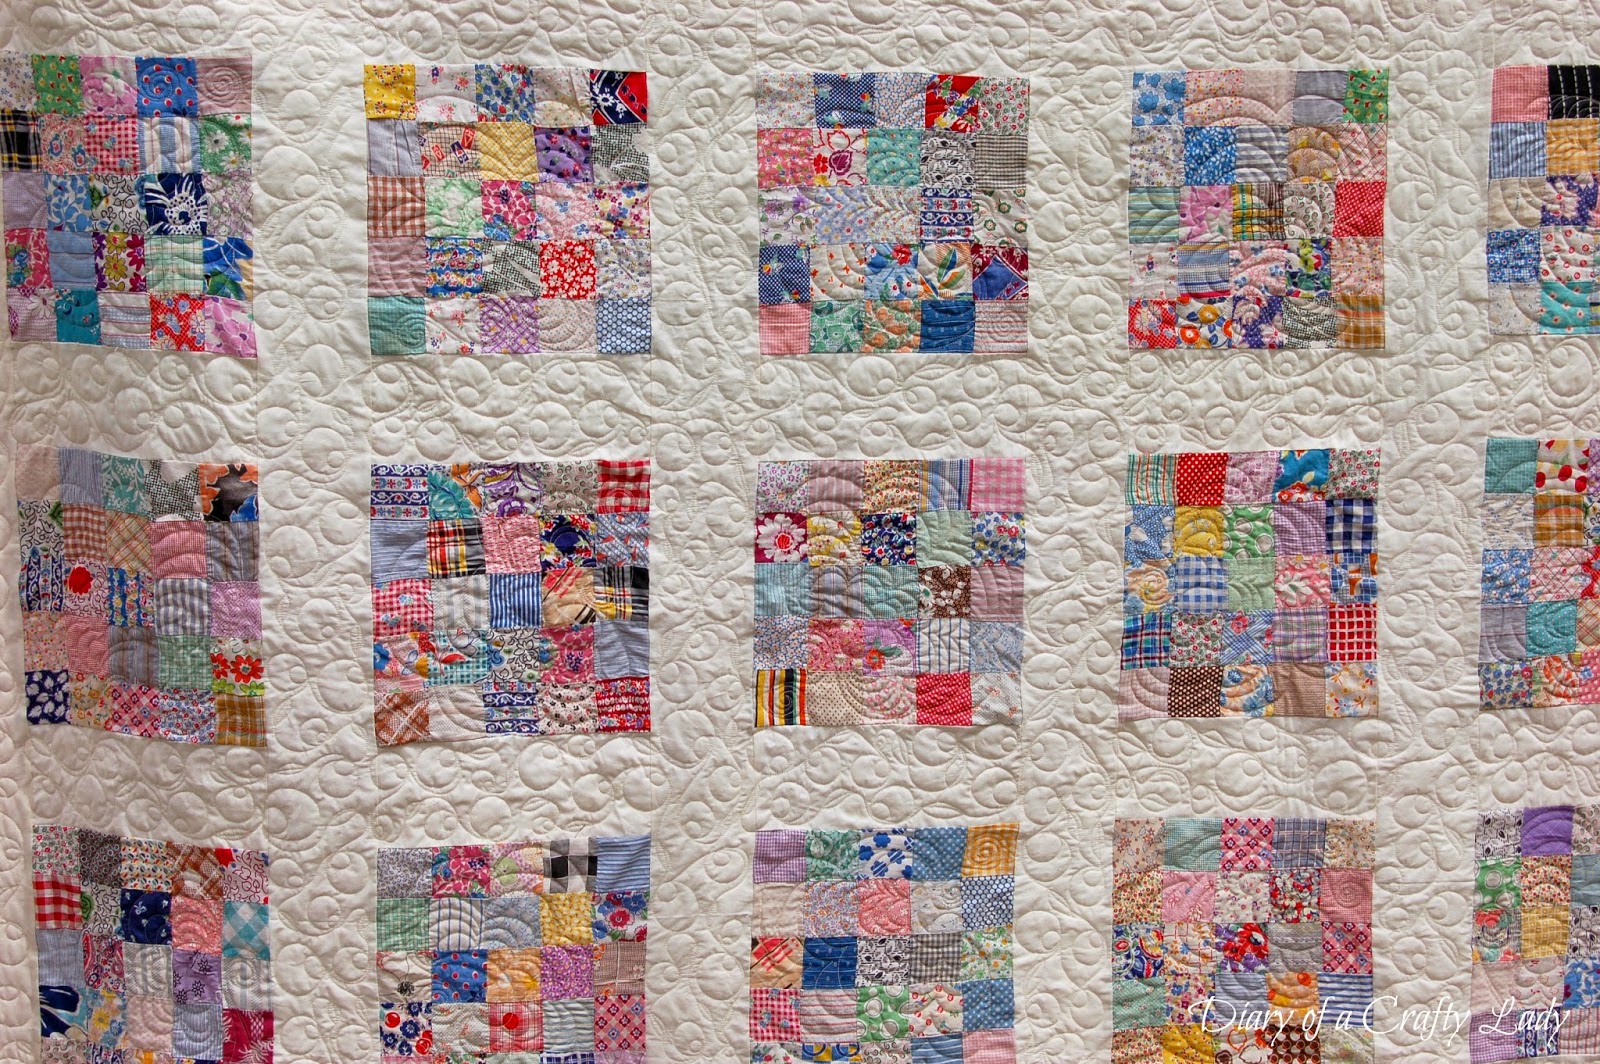
Antique Quilt Top - Now a Finished Quilt!


Its' time to play ketchup on my blog posting.  I've finished a few quilts that I've been so excited to show you - it's just taken me forever to get outside (aka: get my husband to hold them up for me) to take a picture ;)

This is one of my favorite antique quilt tops.  But it started out a little less charming...


Check out that pink!  This one required a little vision.  I don't always spend so much time on these quilt tops.  Sometimes repairs need to be made, but I have not often disassembled the whole top like I did this one.  But I really was not feeling the pink. The blocks were gorgeous though, and for such a reasonable price, I went ahead and snatched this one up!


My first step was seam ripping each block out of that pink sashing.  Nice, mindless work to do in front of the TV.  It left me with this beautiful stack of blocks you see above.  I then spent quite some time reinforcing all the loose seams, and fixing tears, and occasionally patching some holes.  With so many different fabrics and tiny blocks in each quilt square, this process took a fair amount of time.  The blocks were all hand sewn by some lovely person back in the day, so it wasn't surprising that so much repair needed to be done.


I love the look of natural colored muslin in an antique quilt top.  It really lets the colors of the blocks take center stage.  So, I picked up some muslin, and simply added a 4" sashing back in between all the blocks.  Above you can see part way through the process.


Then, I had to wait a while to quilt it, because I love to use my mom's long arm quilting machine, but I have to wait until I go visit her.  I've had a lot of fun (and agonizing) picking patterns that I want to try to free hand quilt onto my finished quilt tops.  


I did a big loopy flower design on each block, and a twirly, leafy vine on the sashing.


I stay up late each night I visit working on quilts, and it is really fun to see it all come together so nicely!  Even for a beginner like me, the long arm machine makes the quilt look so well finished!  I love it!


I went for a bold red backing this time.  I've been wanting a red back on a quilt for a while, and this one seemed perfect for it.


I used an on offwhite fabric with red seed shapes for the binding.  You can see my process for binding a quilt by hand if you click here.
.

I was really worried about the red backing bleeding in the wash though, so I bought this product online called Synthrapol.  It worked great to keep my white fabric white.  I also threw 3 color catcher sheets in the washing machine (found those at Walmart).  Can't be too careful, right?? ;)


And now I have one of my favorite finished quilts so far!  The vintage fabrics and colors are so sweet.  The white is fresh and clean.  The quilting is tight, and after the wash it is nice and crinkly.  I absolutely love it!


I know I've said it before, but quilting is addicting.  So stay tuned, because I have more :)

image signature
Follow me on Facebook