Pages

April 7, 2010

Leaf Alphabet Book


New England is, of course, known for its fall foliage.
I saw a magazine article on making pictures out of leaves, and immediately thought of how perfect that would be - using the New England leaves!
So, that fall, I gathered hundreds of fallen leaves in as many colors as I could find.
I had a lot to choose from - as you can tell...

I put them between the pages of many phone books and left them for months and months, after which I had a box full of dried, pressed leaves to work with.

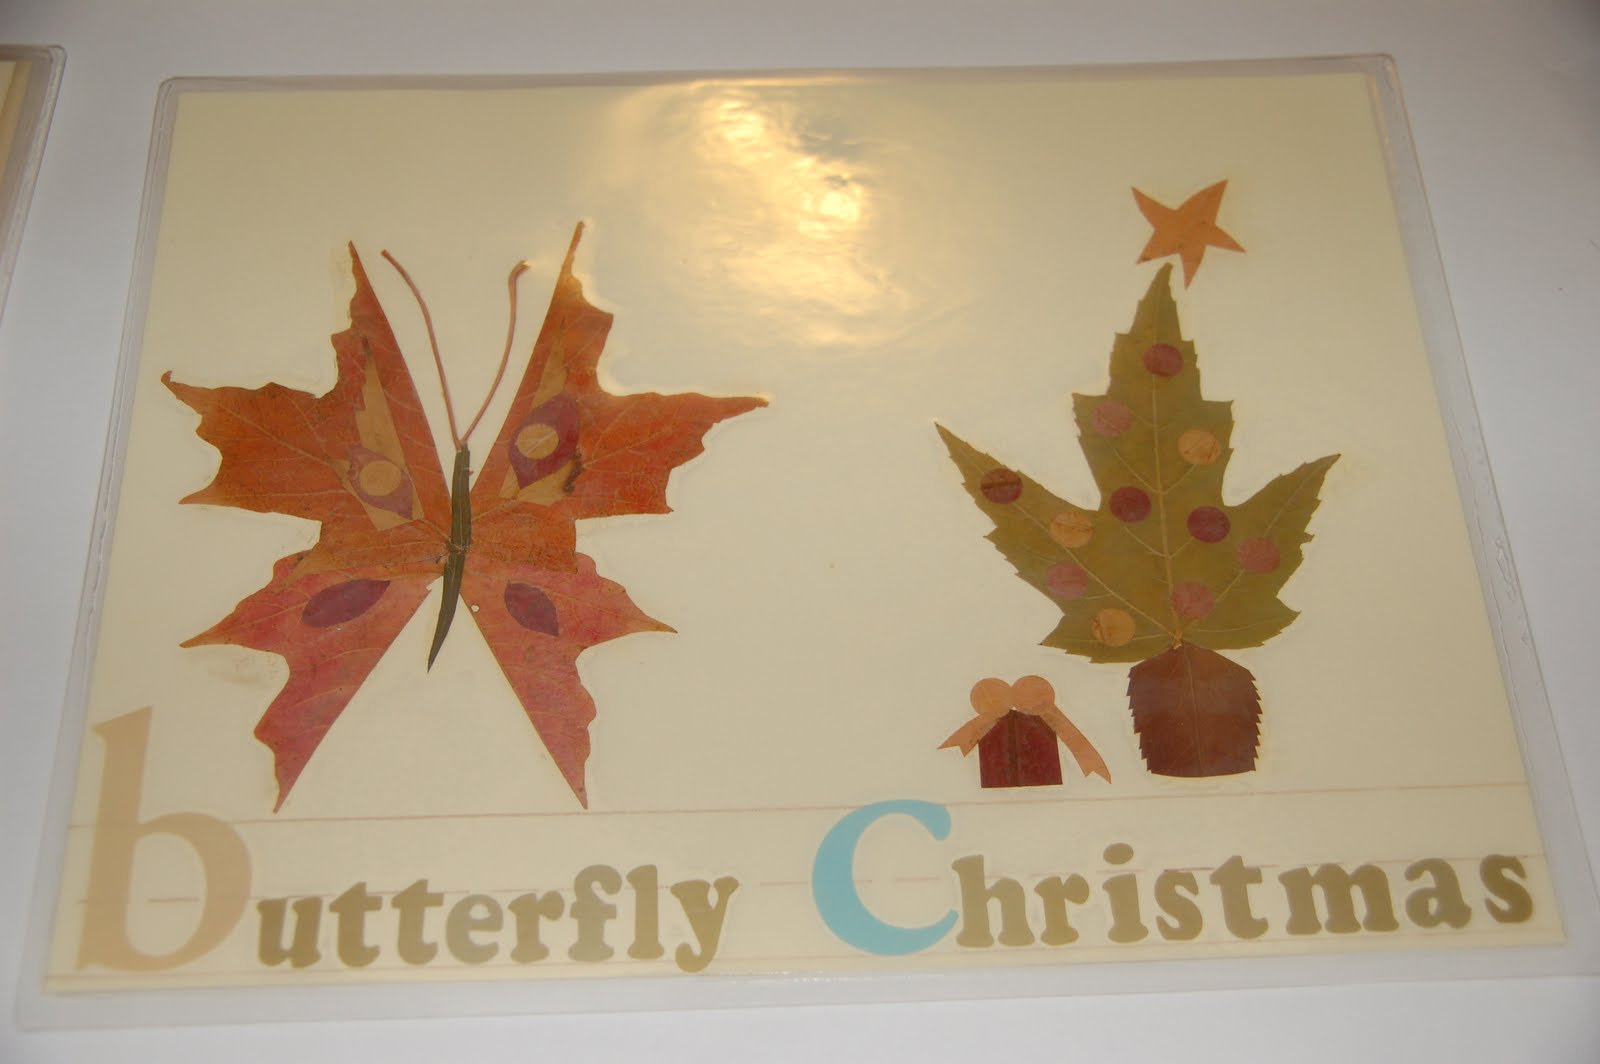
I took thick paper, and drew a dotted line, like school lined paper, and used letter stickers to create the words. 

I used Elmers Glue to glue down the leaves (glue stick seemed to rip apart my leaves).

I tried to leave the leaves intact as much as possible, but some I cut. 

I contemplated carefully which ones I wanted to share a page, and which ones I wanted to have their own page.  I made a list of all the possibilities for each word, and decided which ones I liked best, and which would be easiest to create. 

My list included:
A: Alligator, Ants; B: Boat, Butterfly; C: Crab, Corn on the Cob, Christmas, Candle, Caterpillar, Cricket; D: Dessert, Dinosaur, Dog, Dragonfly; E: Earth, Eagle, Eggs, Elephant; F: Fruit, Frog, Farm, Fire, Fish, Finch; G: Grasshopper, Gecko, Guitar; H: Hammock, Hawk, Harp, Hen, Hearts; I: Ice Cream; J: Jungle, Jelly fish, Jellybean, Jack-o-Lantern; K: Kangaroo, King; L: Lobster, Lion; M: Mouse, Mushroom; N: Nest, Nut; O: Ocean, Owl; P: Peacock; Q: Queen; R: Rain, Raincloud; S: Sun, Solar System; T: Toad, Tarantula, Turtle; U: Umbrella; V: Volcano, Vegetables; W: Warbler, Warthog, Worm, Weather, Whale, Willow; X:Xylophone; Y:Yacht; Z: Zebra


This was my final result.  After I made sure they were absolutely completely dry, I took them to Kinkos and had them laminated with the thickest laminating sheets they had.  Each one cost a few dollars, and they ran each page through their hot laminating press machine twice. 
I am so proud of the way these turned out.  I am planning on finishing the entire alphabet, but even if you wanted to just do one with your child's first initial - or another single letter - they are fun!
image signature

April 6, 2010

Photo/Memory/Ribbon/Cork/Fabric/French Board


I know, it's a long name - but I dont know what to call it!
I just made this as a gift for someone - my first try, and I am pretty happy with it!  Hopefully it will hold together.
The following is a detailed tutorial, including my formula for making the ribbons even (in case you are a perfectionist, like me).

1.  I purchased a 2' x 1.5' cork board.  I am sure you can use plywood, or foam board instead - but I chose cork board so that, in addition to have the ribbons hold things up, I could put these push pins in it as well. 

2.  Fabric needs to be a few inches wider and longer than the board.  For a board this size, with 5 cris-crossing ribbons as you see here, I used 6.5 yards of ribbon, and I was VERY frugal.  I would suggest getting about 8 yards just in case.  The spool of ribbon I bought came in 8 yards.  I also purchased the cheap cheap batting, and doubled it up.

3. Place the batting on the board, and the fabric over the batting, and turn the board over.  Work securing the fabric to the frame/edges of the board.  What you use to do this will be determined by what your board is made out of.  I don't have a nail gun, so that was out.  If I had had nails small enough, I would have used those.  All I had was push pins, so I hammered those into the wooden frame, and they seem to be holding fine.  I started in the middle of each side, and worked my way toward the corners, folding it like a present, and doing the best I could to make it even and fairly tight. 


4.  Next comes the tricky part...deciding where to place your ribbon.  I have made a series of detailed images to help explain my method.

a.  Measure your board along 2 sides and add those numbers together.  In my case 24" + 18" = 42".
b.  Divide that total by the number of ribbons you want going in one direction + 1.  In my case, I wanted 5 ribbons in each direction.  So I divided: 42" / 6 = 7". 
c.  Starting in the upper left hand corner, follow the board around the 2 sides, marking every 7" (or the number aquired in step b).  In the picture below, the red dots represent a mark every 7 inches.  You will do this following line 1 and then again following line 2.  As you round the corner, still measure a TOTAL of 7".  So, if there are 3" remaining along the top, continue down the side another 4" before making your mark.  The picture of the real board (below) shows this.

d. Attach your ribbons where the marks indicate.  Make sure they are tight. 
e. Now, make marks for the crossing ribbons.  To do this, you will start measuring from the bottom left corner.  Again, make marks every 7".  The red dots represent the marks for the 2nd set of ribbons (the crossing ones). 

f.  Attach your ribbons where the marks indicate. Make sure they are tight.

And that is it!  You are done!

Here is another one I made.  This one I sewed buttons - made from a coordinating fabric color - at the ribbon cross sections.  Since it was such a big board (24" x 36") this was the only way that pictures would stay in.  I also covered small unframed pieces of cork board with fabric in a complementing color to use with push pins next to it.  I attached those to the wall with double sided tape.

All covered: 
image signature

April 5, 2010

Painted Wooden Drawer Pulls

My daughter's dresser was missing a knob, and I wanted to make some replacements that were colorful and customized.  So I went to my local unfinished furniture store, and they gave me some leftover drawer knobs (with hardware!).  I really want to make more though, and they don't sell them individually, so I am going to have to find another source.
I painted each with a pastel base coat.  Then, I just free-hand painted some "princess" scenes, since the knobs were for my girl's room.

I sprayed them with about 3 coats of clear gloss, and they look very cute.  The pictures don't show the true color well, and the gloss coat makes them hard to photograph.  I would like to make some for the dresser in another room, but make them more geometric - polka dots and stripes, etc. 
I kindof promised my sister some for her son's room too - so eventually pictures of those will be included:)

Felt Flowers for Hair Bows


This felt flower is easy and beautiful! If you are new to making bows, I definitely suggest this one!
For a template, click here. I suggest printing the template onto cardstock.
Cut out the flower shapes.

Pin them to the felt color of your choice, and cut around the paper. You can re-use the template over and over again, just pin it to a new piece of felt.


Originally, I was tempted to trace around the template onto the felt, but anything you trace with will show on the felt even after you cut, and the cutting doesn't have to be exact to look good. Cutting around a piece of paper is fine.
There are 4 layers to the flower, not including the leaves.


Layers 1 and 2

Layer 3

Layer 4
Put the two green leaves at an angle that looks good to you. 
I didn't use any glue - because I don't like how it soaks through the felt.
It is held together with the button, sewn through the center.


On the back, I sewed either a snap button, or a snap clip, depending on how I wanted to use it.
For a headband, snap buttons make the flowers interchangeable. I made a stretchy band for my baby (modeled by my toddler), and a stiff headband for my toddler.
I also liked using the snap clip, because I don't always want to put a headband on my toddler.


These are a nice and easy way to add variety to my hair bow selection:) Or, you can also use the flower to embellish other things besides heads!
image signature

April 4, 2010

Toddler Ruffle Skirt

Wow.  This was by far the most difficult sewing project I have done.  Usually I sew things that are
very forgiving.  Luckily, I got a really good tip on how to make the ruffles!
Sew a zig-zag stitch (as wide as you can make it) over embroidery floss.  Make sure that you do not catch the floss in the sewn stitch.
Then, you can scrunch the fabric down the floss, and after you have basted it, pull out the floss. 
This pattern was from Pink Fig Patterns - and man, do they have some cute stuff!
image signature

April 3, 2010

Easter Egg Fun

Little sweetie and I did a few easy things to make the eggs look a little more fancy this year.
Also, I saw this idea in a magazine which made it SO much easier for her!  We used a wisk to hold the egg while she dunked it.  Genius!


1) Masking tape - Dunked in a few colors, re-masking taped each time.

BEFORE / AFTER

2) Rubber Bands

 BEFORE / AFTER

3) The little stickers that come with the dye


BEFORE / AFTER (peeled off the stickers to reveal the polka dots)