Here is how I did it:
This is the leaf shape, and stem shape - to use as a guide.
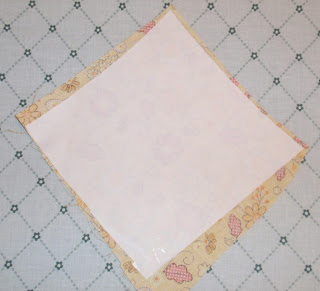
For each leaf, cut a piece of fabric, a piece of heat-n-bond, and piece of felt, each big enough to fit one leaf.
Apply the heat-n-bond to the wrong side of the fabric according to package directions. Peel off the backing and iron it to the piece of felt.
Trace the leaf shape onto the felt and cut it out. (You'll be cutting through the felt, heat-n-bond and fabric that have all been ironed together.)I chose scraps of yellow, orange, and green fabrics for my leaves, and used orange, brown, tan and green felt for the backs.
Cut stems out of stiff brown felt. (If you are using the phrase "happy fall" you will need 9 leaves and 9 stems)
Using fabric glue, glue the stems to the back, top of the leaves.
I decided to add decorative stitches to the outside of the leaves. I used embroidery floss that coordinated with the color of the fabric, and did a running stitch about 1/8" from the edge.
Using this template, (or any font you choose, enlarged, outline only and printed out), trace the letters onto brown felt and cut them out.
Now, I simply love to use my sewing machine, so I sewed the letters onto the leaves, using matching thread, and sewing as close to the edge as I could. It didn't take very long, and looks very nice. However, this can be a completely no-sew project if you use fabric glue to attach the letters. Either way is great!
Once all the leaves are done, choose a long piece of rick-rack, or colorful ribbon, and glue or sew the stems along it in the correct order - and you are done!
Now, I just have to decide where to put it. It looks so colorful and festive! You could even add things like buttons, or raffia, and continue to embellish it!
I am very happy with the way it turned out...I have a feeling I will be making buntings for every season:)

I'm linking up to:


Hi, I just wanted to let you know that I received my first blogger award, and that I've passed it onto you 'cause I find your blog so creative. I the leaves are so cute, if I only had the time to create all the things I see on awesome blogs like yours...ah, well. You can find the award and the rules here: http://littlebirdseeds.blogspot.com/p/my-firt-blogger-award.html
ReplyDeleteTana Cox
Chillbabie at hotmail dot com
Your eclectic fall leaf banner is SO GORGEOUS! The different patterns gives the feel or a real fall (rustic, warm) while the bold leaf shape keeps things unified. I'll have to keep following you for inspiration!
ReplyDeleteI love your bunting and all your attention to detail. Thank you for the templates as well! I'll have to add this to my to-do list!
ReplyDeleteReally one of the best banner ideas for fall that I've seen. Wonderful!! KarenK
ReplyDeleteThis is so great! Look relatively easy too. Thanks for sharing the how-to.
ReplyDeletePS- I featured this today on my blog! :)
http://adventuresofthemichelenafamily.blogspot.com/2010/10/feature-friday-6.html
This comment has been removed by the author.
ReplyDeleteI love this! Visiting from TaterTots. So glad I found you. Excellent job with your tutorial. I love that this could totally be no sew :-) Jenn from www.thismommyloves.com
ReplyDeleteLove the colors and fabrics you have used! Your bunting is adorable! Hope you are enjoying your weekend! ~ Stephanie Lynn
ReplyDeleteI love it! Soooo cute! I made a banner for Halloween but I love this so much you may have inspired me to make another! This is the link to my banner if you want to take a look...http://findingmyaloha.blogspot.com/2010/10/my-spooky-mantle.html
ReplyDeleteI absolutely love it!!!
ReplyDeleteaw this turned out so cute! I want to do this now! If you have time come link up to Handmade Tuesdays @ www.ladybug-blessings.com
ReplyDeleteI've been wanting to do a fall-themed banner for a while, only knowing I wanted it to include leafs somehow. Been brainstorming/researching high and low, coming up with nothing I liked. Until I saw this. Upon seeing the first pic, I just thought, 'This is it!' Great banner!
ReplyDeleteHi there! I featured this tutorial on today's handmade monday post. Hopefully it will drive some extra traffic to your great blog :) Thanks for the inspiration!
ReplyDeletehttp://www.ohsweetjoy.com/2012/09/fall-DIY-project-and-recipe-roundup.html
It makes it so much more accessible for those of us who aren’t great with a sewing machine. Thanks for sharing such detailed instructions!
ReplyDeletemobile compactor India
fifo flow rack delhi
It adds a handmade, rustic feel to the bunting. I appreciate the option of using glue too!
ReplyDeleteSlotted angle rack manufacturer
pallet rack supplier
The idea of adding buttons or raffia for extra embellishment is great. Thanks for sharing this fun and creative project!
ReplyDeleteDust Collector
Franchise Opportunities