


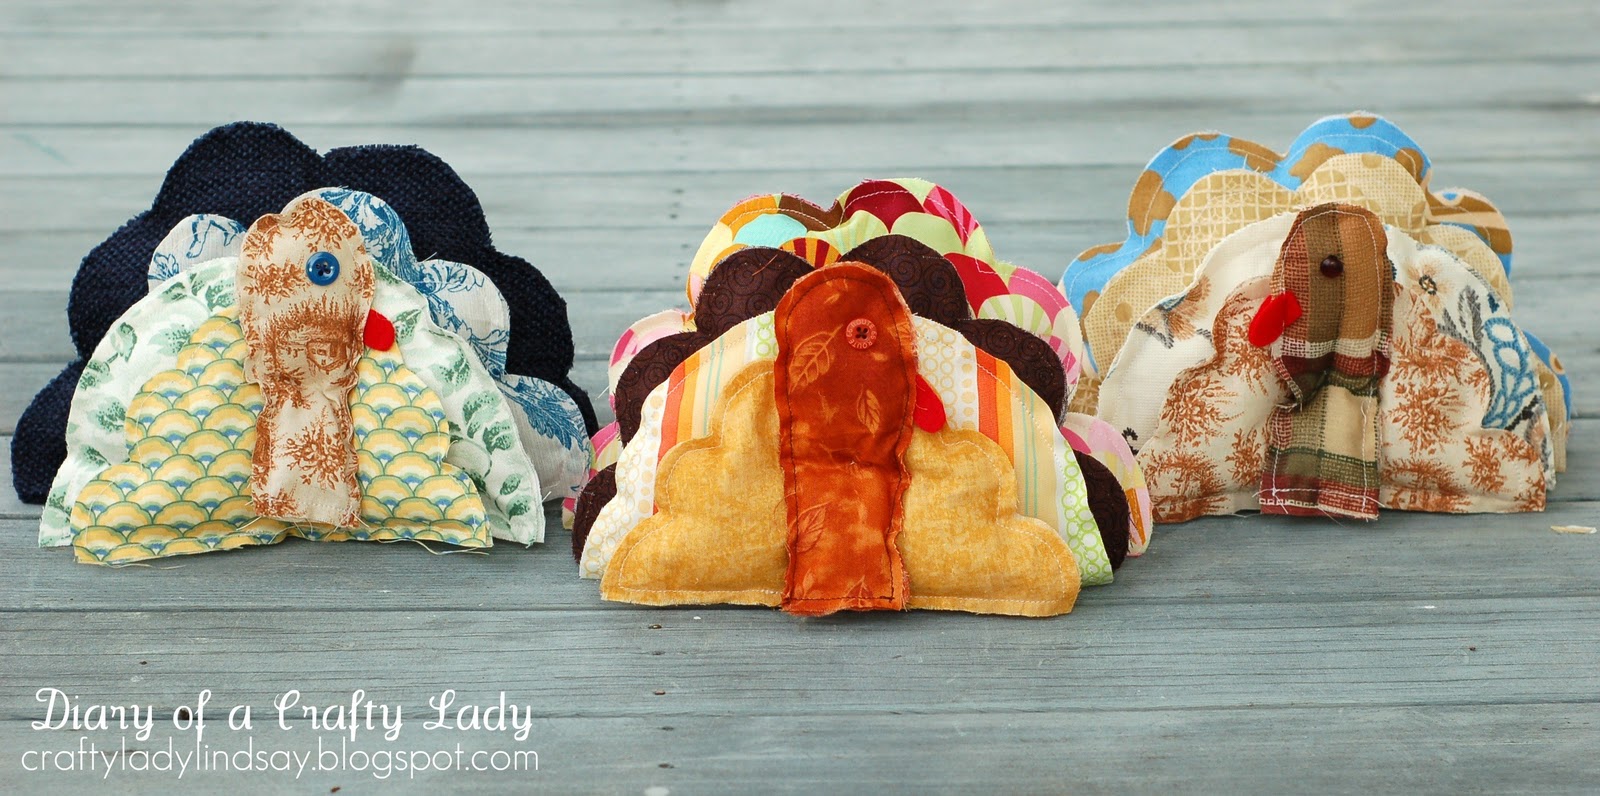
I came home and made myself a pattern, and whipped out a few the next day...

These little guys are great, because they can be made with scraps of fabric, and you can really use any color scheme!
Want to make one (or ten) of your own??
Here is the tutorial:
You will cut 2 pieces of fabric from each pattern piece.
To do this: Trace each pattern piece on to a piece of fabric twice, once with SIDE A up, and once with SIDE A down! The pieces are not symmetrical, so this detail is important!
Cut out all the pieces. I used a different color fabric for each set of feathers (remember you are making 2 of each piece).
Cut out a tiny gobbler from red felt - as shown below.

Place each set of fabric pieces wrong sides together (so that the right side of the fabric faces out on both the front and the back).
Sew around the outside edge with 1/4 inch seam allowance, and leave a 2 inch hole in the bottom for stuffing.
When you are sewing around the turkey's head, sandwich the gobbler between the fabric about 1/3 way down (as shown below) so that you catch it in the stitching.

Stuff each piece VERY LOOSELY. Use the bare minimum amount of stuffing that you can - just enough to make an even layer. Then sew the opening closed.

Sew a button eye onto both sides of the turkey's head.

Layer the pieces, starting with piece 1 on the bottom, all the way to piece 5 on the top. Line up and center the bottom edge on all the pieces. (You will end up with the largest piece on bottom progressing to the smallest piece on top).


Thread a needle with a long piece of thread, and tie a big knot in the end.
Starting in between the layers, so that the knot is hidden, sew back and forth through the middle of all the layers a few times - but not too tight!! If you want your turkey to stand up straight, it needs to be loosely sewn together. To finish, sew to a middle layer again, and knot the thread so that you can cut it and the knot will be hidden.

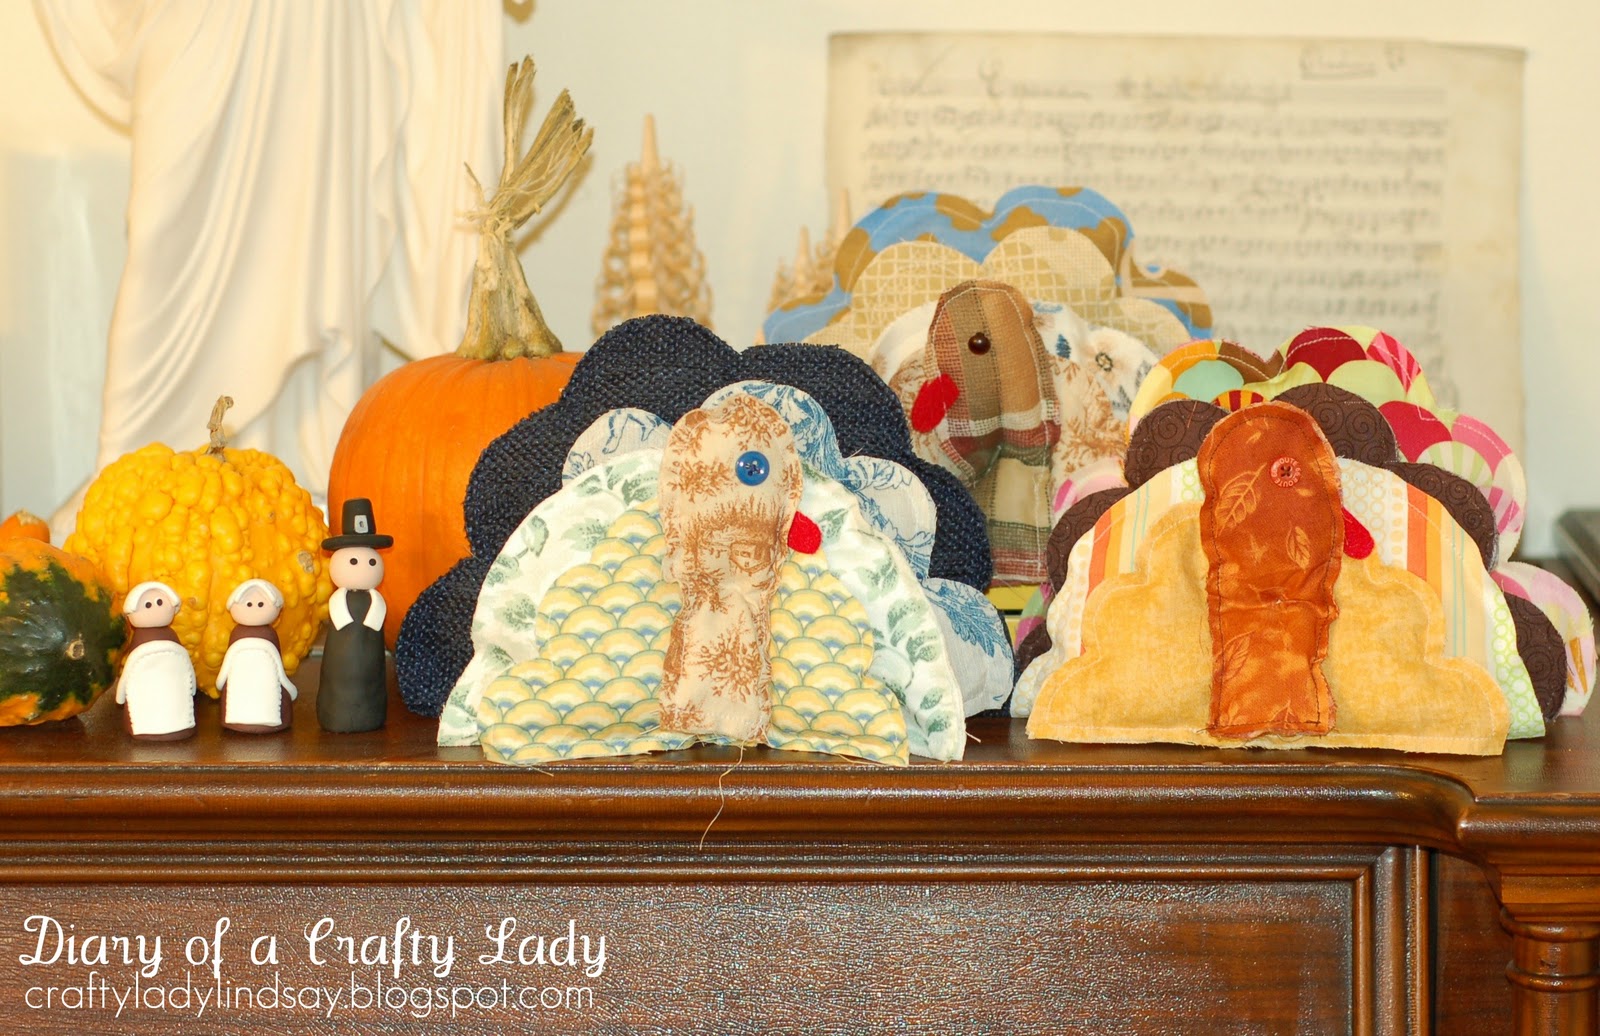
And that is it! So quick, you can just make more and more and more!
These little turkeys would make a fabulous Thanksgiving gift...you could give them to a friend with a little note about how thankful you are for them :)
These would also be fun to use as place cards at the Thanksgiving Table...with each person's name on a string around the turkey's neck...

I hope you all have a Happy Turkey Day!

Follow me on Instagram @ diaryofacraftylady
Follow me on Facebook


You already made some?!? They're SEW cute!
ReplyDeleteWhat fun- makes me wish that we celebrated Thanksgiving in Australia just so I could make on of these little cuties! Lou
ReplyDeleteThese are so cute! I bet they would be fun to make with kids too.
ReplyDeleteSo Fun Lindsay! I printed out the pattern, and hope hope hope to make some! ANd I love Malena's little pilgrims in your display:)
ReplyDeleteOh gosh I just finished some stuffed turket hands but now I want to make one of these! I have a little sewing and fabric craft linky party I'm starting tomorrow and I was wondering if you could be so kind to stop by and post it? Thanks so much!
ReplyDeleteSew Country Chick
I love this! What a great way to decorate and use up some stash fabric too. Plus, I really appreciate holiday decorations I don't have to worry about my toddler touching. So cute! Would you link it up to my party?
ReplyDeletehttp://daysofchalkandchocolate.blogspot.com/2011/11/blog-love.html
love all the fabrics you used.
ReplyDeleteStop by for a look at my Shabby Apple "Little Black Dress" Giveaway! Hope you'll join the fun!
ciao
I love these! I told my boyfriend I was going to make 13 (we have 13 turkeys) and he rolled his eyes. But I love them!
ReplyDeleteFound you on I heart Naptime
GET OUT THESE ARE JUST ADORABLE. You can even put little cards in them and make them place cards at your Thanksgiving table. I am going to share these on my COM-FB page.
ReplyDeletewinks, jen
Cute!!! I love these!
ReplyDeletesurecancraft.blogspot.com
These are adorable!! I can't wait to make some!
ReplyDeleteI would love it if you'd participate in my weekend homemaking link-up party! It runs every Friday-Sunday and there's a button at the top of my sidebar you can grab to help you remember!
Have a great week!
Sarah
These are beyond adorable!
ReplyDeleteThese are ADORABLE!! LOVE!!
ReplyDeleteWe would love for you to link up to our "Home For The Holidays" link party! ;)
www.uncommondesignsonline.com
SO cute! I really love these. Very creative and so festive!
ReplyDeleteHi there, these are so adorable and I bet you had lots of fun making them, good craft to work on with the kiddies too. Thanks for sharing. I have recently found your blog and am now following you, and will visit often. Please stop by my blog and perhaps you would like to follow me also. Have a wonderful day. Hugs, Chris
ReplyDeleteI cannot thank Mr Benjamin service enough and letting people know how grateful I am for all the assistance that you and your team staff have provided and I look forward to recommending friends and family should they need financial advice or assistance @ 1,9% Rate for Business Loan .Via Contact : . 247officedept@gmail.com. WhatsApp...+ 19893943740. Keep up the great work.
ReplyDeleteThanks, Busarakham.