My dad and I love doing projects together, and over the Christmas break, he and I made this beautiful bench as a gift for my mom. When I first saw
this blog post at My Re-Purposed Life, and
this one here at Blue Cricket Design, my jaw dropped to the floor.
I fell in love with this idea!
My dad said that he would help me make one when I came into town for Christmas (after all, he is the one with the never ending supply of power tools! Not to mention a plethora of good ideas:) )
 |
| Just to Name a Few of the Tools we used |
He kept an eye out and found us some headboards and footboards to work with - and as soon as I got into town, we got started.
I took quite a few pictures, but I will have to give you a disclaimer here...there was SO MUCH SAWDUST floating around in the air, that not all of the pictures are the best quality. We made these in the garage, and because it was dumping 3 feet of snow outside the garage door, we couldn't really work in the open air... It was interesting - but worth it after we were finished!
Below are before pictures of the headboard and footboard. The headboard had a lovely carving design that we knew would add a beautiful decorative element to the bench.
The footboard, which belonged to the same bed as the headboard, was too short to work as proper arms for the bench, so we modified it.
On each end, we added a notched 2x4, measured to fit the height we needed.
We always reinforced our wooden pieces with wood glue, and thoroughly screwed, nailed or bolted the pieces, depending on the depth and stability of the wood.
We also always
counter sunk our screws and
drilled a pilot hole, so as not to split the wood.
For these legs we screwed the 2x4 pieces into each end of the footboard.
You can see above how the footboard would later be cut to become the arms of the bench.
To the headboard, we attached a box that would become the seat. We used pine 1x4's to build the box. The length was calculated simply by measuring the length of the headboard.
The depth was calculated by deciding that we wanted to use 1"x6" helmock boards for the seat, with a 1/2" gap between each board, and an overhang on the front of about 1/2". Ultimately, the width of our box was about 14", and the length was about 55".
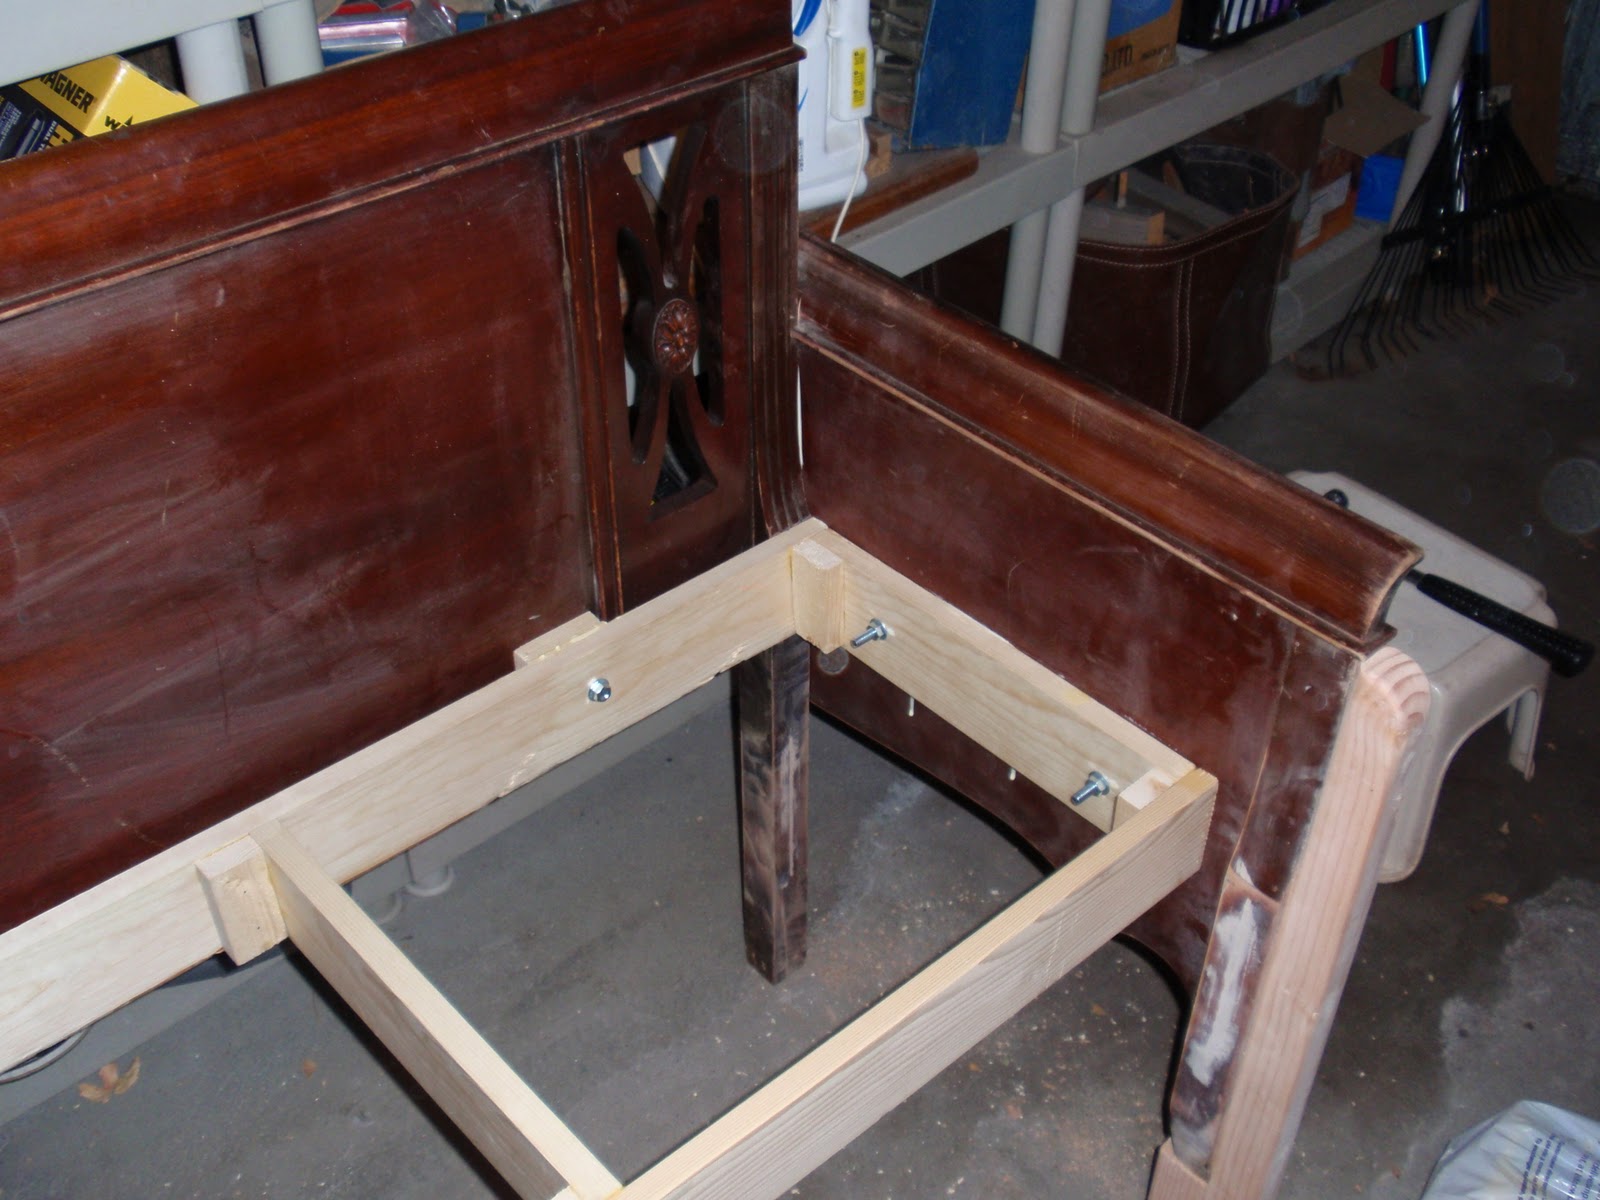
As you can see in the picture below, we fastened two additional vertical pieces in the middle of the box for stability, and put small rectangular cut pieces of 1x4" boards into the corners. The entire box was glued and nailed together with a brad nailer (a.k.a. nail gun).
We then clamped the box onto the headboard at a height of about 20-21".
We bolted the box onto the headboard in three places, as you can see in the picture above. That seat wasn't goin' anywhere!
We carefully calculated the length that we needed to cut the arms, based on the wood we were using as the seat of the bench, the gaps in between the seat slats, and how far we wanted the arm to overhang the seat. In the case of this particular footboard, we decided to have the arms overhang the seat because of the pieces jutting out at the ends. We discovered throughout this project (
and another one we did!) that every measurement and length, how you screw and bolt things together, where you cut, etc., is ENTIRELY dependent on the layout of the wood and the decorative elements of the headboard and footboard. You really have to have a good eye and good brain for winging it:)
We then attached the arms by screwing them into the headboard/back of the bench, and bolting them to the box/seat of the bench.
With this complete, all that was left of construction was cutting the seat boards to the correct length, and nailing them to the box.
We nailed them (again using the brad nailer) along the 4 short vertical strips of the box. One section is shown below.
Then came the
*fun* part. Okay, so it wasn't
so fun - considering how cold it was, and how LONG this part took:)
We painted the bench with a dark cherry color, similar to the color of the original headboard and footboard, so that when we distressed the bench later, this color would show through.
Then, we painstakingly added
THREE MORE COATS of white paint over the dark.
Once it was completely dry, we took our handy dandy palm sander and went to town on all the edges - making the bench look worn and distressed.
Some parts were sanded by hand, particularly the carved detail and inner edges of the seat slats...
But since we wanted to get all the way through three layers of paint, back to that dark coat, we sanded for a long time with the electric sander.
It was SO GRATIFYING when it was done - and let me tell you what a surprise it was for my mom!! She was thrilled with the bench - and already wants us to make more:)
For now, this one sits in her bedroom, and is being used as a display for her ever growing collection of hand made quilts.
It was quite an undertaking, and not a project of the faint of heart (I have more band-aides on my fingers than I can count!) but it is also incredibly fun and satisfying! We will definitely be making more!
I am Linking up to:


Beautiful! What an awesome project
ReplyDeleteI am visiting from the CSI. I am enteries number 86, 87, 88 and 89.
ReplyDeleteI love chippy paint.
Your bench came out gorgeous. I have one I have been working on but am not finished yet.
Cheri from www.itssoverycheri.com and www.thediyclub.com
Wow Linds! It looks great. I'm so impressed. I bet Wendy loved it!! Jealous:)
ReplyDeleteLindsay! You are amazing! And I love that you and your dad worked on it together--priceless! Thanks for sharing!!
ReplyDeleteLindsay - I just love this! And it is so fun that you and your dad worked on this together! Wow! I hope you are linking this project up to several different parties because it is just wonderful. I bet your mom was just thrilled and overcome with emotion. I love the detail on the back of it - gives it so much character. Wow. Just beautiful!
ReplyDeleteI just love it! Looks like it is VERY well made!
ReplyDeleteYou are quite the woman to make this for your mom!
How nice of your Dad to help!
Wow what a great idea and looks so great!
ReplyDeleteWhat a sweet thing for you to do for your mom! It looks beautiful!
ReplyDeleteThere's a fun surprise waiting for you on my blog today :)
Great job on the bench. You and your dad make a great team! So, now you know... they are very addictive! I can't even tell you how many I've made! I have at least 10 beds in inventory just waiting to be made into benches. :)
ReplyDeletethanks for linking to me.
gail
LOVE it!!
ReplyDeleteYou know, my MIL has an antique bed that she loves, but it is very impractical as a bed - it is so fragile. I'm going to suggest she turn it into a bench!
This comment has been removed by the author.
ReplyDeleteI LOVE headboard benches! Great job!! Thanks for linking up to Sassy Sites- Trash to Treasure Tuesday! We are doing a LABEL giveaway today, so come back and check it out!
ReplyDeletexoxo!
Marni @ Sassy Sites!
I love your headboard bench great job! Thanks for linking up to Your so Very Creative I featured you today go check it out! http://memakingdo.blogspot.com/2011/01/featuring-you-friday_14.html
ReplyDeleteThis is so sweet! I love to do projects with my dad too :D Thanks for being a part of "Amaze Me Monday".
ReplyDelete~Dittle Dattle
LOVE the benches!! You're very lucky to be able to share these kinds of projects with your dad!! Cherish those memories!!
ReplyDeleteThanks for sharing the tutorials!!
Hugs ~~ Suz
inspiringcreativeness.blogspot
Wow. This is perfect! I love that you made it with your dad. That can be an heirloom piece.
ReplyDeleteYou must go out looking for beds to turn into benches! lol Looks great. Dropping by from Furniture Feature Friday. Hope you'll drop by to see my chairs.
ReplyDeleteAllison
Atticmag
I can see that you are an expert at your field! I am launching a website soon, and your information will be very useful for me.. Thanks for all your help and wishing you all the success in your business. connect headboard to wall
ReplyDelete