Pages

October 13, 2013

Ashley's Halloween House {Specimen Bottles}


Talk about a perfect combination of creepy and clever.
My sister has been collecting these unique, old cork top bottles over the years, and filling them will all sorts of mythical scary things.  

This fabulous display is on the table right as you walk in the door, and such a fun focal point.  Wait until you see it all up close...


The fairy skeleton and cyclops eyeball are so easy, you won't believe it.
Both are little grow-in-water toys that have been soaking for much longer than the recommended 2-3 days ;)  
The water was simply tinted with a few drops of food coloring, and the toys were left to grow for all time.  These have lasted multiple Halloweens, and they look as creepy as ever!


Some of the labels my sister made herself - and some she has picked up at garage sales, and various craft stores.  
This label was store bought, and the mummified earwigs were my sister's own clever invention.  

October 11, 2013

Ashley's Halloween House {Outdoor Decor}


My sister is a Halloween fanatic!  She throws the most amazing Halloween parties, and starts to purchase Halloween items 12 months in advance - at all the "day after Halloween" sales ;)


Her home is a treasure trove of great Halloween ideas, and I wanted to share a few of them with you!


One of my favorite decorations she has is this Halloween direction sign, which she made entirely herself.  

She based the idea loosely on the directional sign I made a couple years ago - but boy, did she take this to a whole new level!  I covet it, highly :)


October 8, 2013

Black and Gold Halloween Cauldron Clock


I love clocks.  I love the idea of making anything into a clock!  
To me, clocks are like wreaths, or pillow covers.  Why not make one for every season??  Switch them out to match your holiday decor - and have it be anything you want!

I had an old clock I didn't want to use anymore - but instead of throwing the whole thing away, I took the clock mechanism out of it, and re-purposed it! (This is as easy as carefully pulling the hands off, and unattaching the box in the back that holds the battery)

So that means that this project cost me a total of $0 - that's what I like!  Plus, I did it all by hand - no vinyl or cutting machine required.

October 1, 2013

4x4 Post Painted Pumpkins


Power Tools, Posts, and Paint to make Pumpkins?  Perfect! 
(yes I am using cheesy alliteration ;)

My friend saw these pumpkins over at Simply Kierste and asked me to make a few for her.  
Aren't they cute?!  


The nice thing about these is that the rough wood, and extra sanding, make them look shabby and delightful - so the painting doesn't have to be perfect - and any differences make them even more charming!  

I used vinyl dots as a reverse stencil, but you could easily use those colorful dots you can get at the office supply store.  And the stripes are made with painter's tape.  So no vinyl cutting machine required!

The thick branches as stems are a perfect touch (FYI - I would definitely suggest using wood glue to secure them - not hot glue - because they are very heavy!)


Not only are these a fun decoration for yourself - but they are perfect fall gifts for friends!
Technically there are 3 to a set - small, medium and large - but my friend had the idea to give just 1 pumpkin as a present, which I think is brilliant.  They are cute all by themselves, and with the twine tied around the stem, even just one would be a great addition to a mantel or porch.  

So, what are you waiting for?  Make yourself a few!
image signature
Follow me on Facebook


September 28, 2013

Halloween Bat Wreath {Easy & Inexpensive}


Are you as into wreaths as we are?  
My girls like to have a wreath hanging from their bedroom door - and because they are SO easy and inexpensive to make, we often change up the wreath for the season or holiday.  

What makes them so inexpensive and easy you ask??
For every wreath I make I use a $1 foam tube from the plumbing section of the hardware store as a wreath form.  They are awesome!  If you get the kind made for 1/2" tubing, they curve very nicely - and you can make the circle any size you want (I usually get 2 wreaths out of 1 length of tubing) - just cut it where you want it, and tape the ends together with packing tape.  Easy!


For this bat wreath, we wrapped the whole thing in yarn.  This is where my daughter is an invaluable helper!!  She helps me wind it around, I hot glue every few twists, and we get it done fast!

We made the moon and the bats out of construction paper, and I used a few pieces of wire to make some of the bats stand up.  The wire pokes into the foam easily and a dab of hot glue helps everything stay put.  Hang it with a loop of ribbon and you're done!


Wasn't that easy?  
Now you can go to town and have fun!

Check out some of the other wreaths I've made using foam tubing:

image signature
Follow me on Facebook


September 26, 2013

Halloween Welcome Sign


As a birthday present to myself this year, I started putting up Halloween decorations in September ;)  As I've been getting things set up, I've also done a few quick projects that I want to share.

I saw this Halloween Canvas over at Eighteen25 blog, and thought the saying was darling.

So, I made my own Welcome to our Haunted Home sign - but instead of canvas, I used an old reclaimed piece of wood, and paint.

I used vinyl as a stencil, but if you want to paint this by hand - check out the tutorial for this Broom Parking Halloween sign I made without a vinyl stencil.

I started with an inverted type of image (below) - but wasn't sure I liked it, so I flipped the board over and painted it again with the opposite color (above).  In other words, in both cases I painted the black paint over vinyl - I just switched whether the house and words were covered in vinyl, or not.
  
So now I can choose which side to display! A quick rub with some sandpaper makes them look even more rough and Halloweeny ;)


What do you think?  Are you getting Halloween decorations out yet?  
image signature
Follow me on Facebook


September 25, 2013

Building a Deck {A Power Tool Project}

I recently posted about visiting my parents, and all the great and crafty things they have around their house.  Well, while I was visiting, I also helped my dad build a deck (or, he helped me build it ;) right dad?)
I thought I'd post a few pictures of the process, mostly because I am so proud of it.  It was fun to work on: both because I like using power tools, and because I cherish the time with my dad.  It's also great to go back and visit, and see it in good use!


My parents have just finished an addition on their house, and these new back doors conveniently lead to nowhere ;)  After they put grass in, and started on a stone path, they wanted to build a small(ish) deck with a few steps leading down onto the path.  So here is a pic of the floating doors...

We started by building a box out of 2"x 6" pressure treated boards.  The board against the house had 8 or so lag screws to anchor it into the wall.  The box was about 6' x 5', so about every 14" we had a cross beam.  These cross beams would support the top of the deck.

September 14, 2013

Magnet Fanatic


A while back we had a craft night with a bunch of friends, and one of the things we did was make magnets.  It is no secret that I love making magnets (and giving them as gifts).

Case in point - I've made and blogged about:
Mini Polaroid Magnets
Yardstick Magnets
Faux Rock Magnets made from Clay
Bottle Cap Magnets and Here
A Dishwasher Magnet
Mustard Container Pen Holder Magnet

Well, here are a bunch more cute magnets that I have made and wanted to share.  And honestly, magnets for your fridge can be as simple as e6000 gluing a super strong magnet on the back of a happy meal toy.  It is fun when you get creative :)


First of all: Puzzles.  My favorite magnets are probably these ones that I made out of puzzles.  Above is a great USA puzzle.  States are grouped onto puzzle pieces, which makes the magnets a perfect size.  I simply glued a rare earth magnet to the back of each piece.  Now my kids have fun taking it apart and putting it back together -- and it's educational ;)

You've all seen (or have) these puzzles made for kids, where each puzzle piece fits into a hole of the same shape, and has a little peg on it.  These make AWESOME magnets.  I was inspired by this pin on pinterest, and made some magnets out of a vintage fruit puzzle.  I love them in the kitchen.  BTW, thrift stores are a GREAT place to find these puzzles!


Have a puzzle with a bunch of missing pieces?  Repurpose those leftovers into magnets!  Inspiring Creations has a great tutorial.  I used book page paper, scrapbook paper, distress ink, stickers, buttons...it was fun!


Aren't clothespins an awesome invention?  They have so many uses - not to mention the fact that they are inherently darling.  I took a few, painted them different colors with acrylic paint, and started gluing stuff on.  I glued paper, fabric, buttons, ribbon... I stuck stickers, wrapped string.  I love these, because you can clip pictures and notes IN the clothespin, or use them as a traditional magnet.  As with all of these, simply use super glue (like amazing goop) to glue a magnet onto the back.


Couldn't be any more simple than this.  Glue a magnet to the back of buttons.  Since I have a few 1" buttons that I don't know what to pin on, why not use them on the fridge instead?


Game pieces make really cool magnets.  Here are my scrabble ones (fun for writing messages too) - and a LEGO magnet I made on a whim.  


A while back, I had some little mosaic tiles laying around - and painted letters on them to spell my daughter's name.  With a little clear protective spray on the top, they have lasted a long time!


And last but not least - washi tape magnets.  Jumped on the craze (if you count my 4 rolls of washi tape as jumping on...).  It is really cute stuff - I'll give them that.  Check out my inspiration here at Twirling Betty.

By the way - ebay is a great place to buy rare earth magnets in bulk - because let's face it, you can never have too many magnets.  Right?

And guess what?  I have even more magnet inspiration on my Magnet Pinterest Board!  Go check that out too - and then make yourself some magnets!!
image signature
Follow me on Facebook


September 8, 2013

Bibs in Bags and Making Mom's life Easier!


A while back, I made a bunch of these Towel Bibs for my babe - and they are fantastic!  But, being the busy mom that I am, I have found that lately I am negligent in actually putting them ON the baby at meal time ;)

I usually just plop her in the high chair, give her some finger food (which she loves!) and go about making dinner for the rest of us, or doing the dishes, or something else in the kitchen.  I don't take the time to go into her room to get a bib.

This inevitably backfires on me - because of course her clothes get so messy that I have to go into her room anyway, to put her in a new outfit!

Then, I got a brilliant idea...


A long while back, I made these cool Quilted Grocery Bag Holders - which I use constantly.  When I made them, I had so many bags that I needed two.  Now that I'm more diligent about using reusable bags, I get fewer plastic bags, and only need one.  So what do you think I decided to do with the other bag holder?!


You got it!  I stuck all my bibs into the other bag holder!!  I have ZERO drawer space in my kitchen for bibs, so this plan seemed like a genius way to get the bibs out of the drawer in the bedroom, and into the kitchen!  I hang them in the nook where I hang my aprons... awesome.  


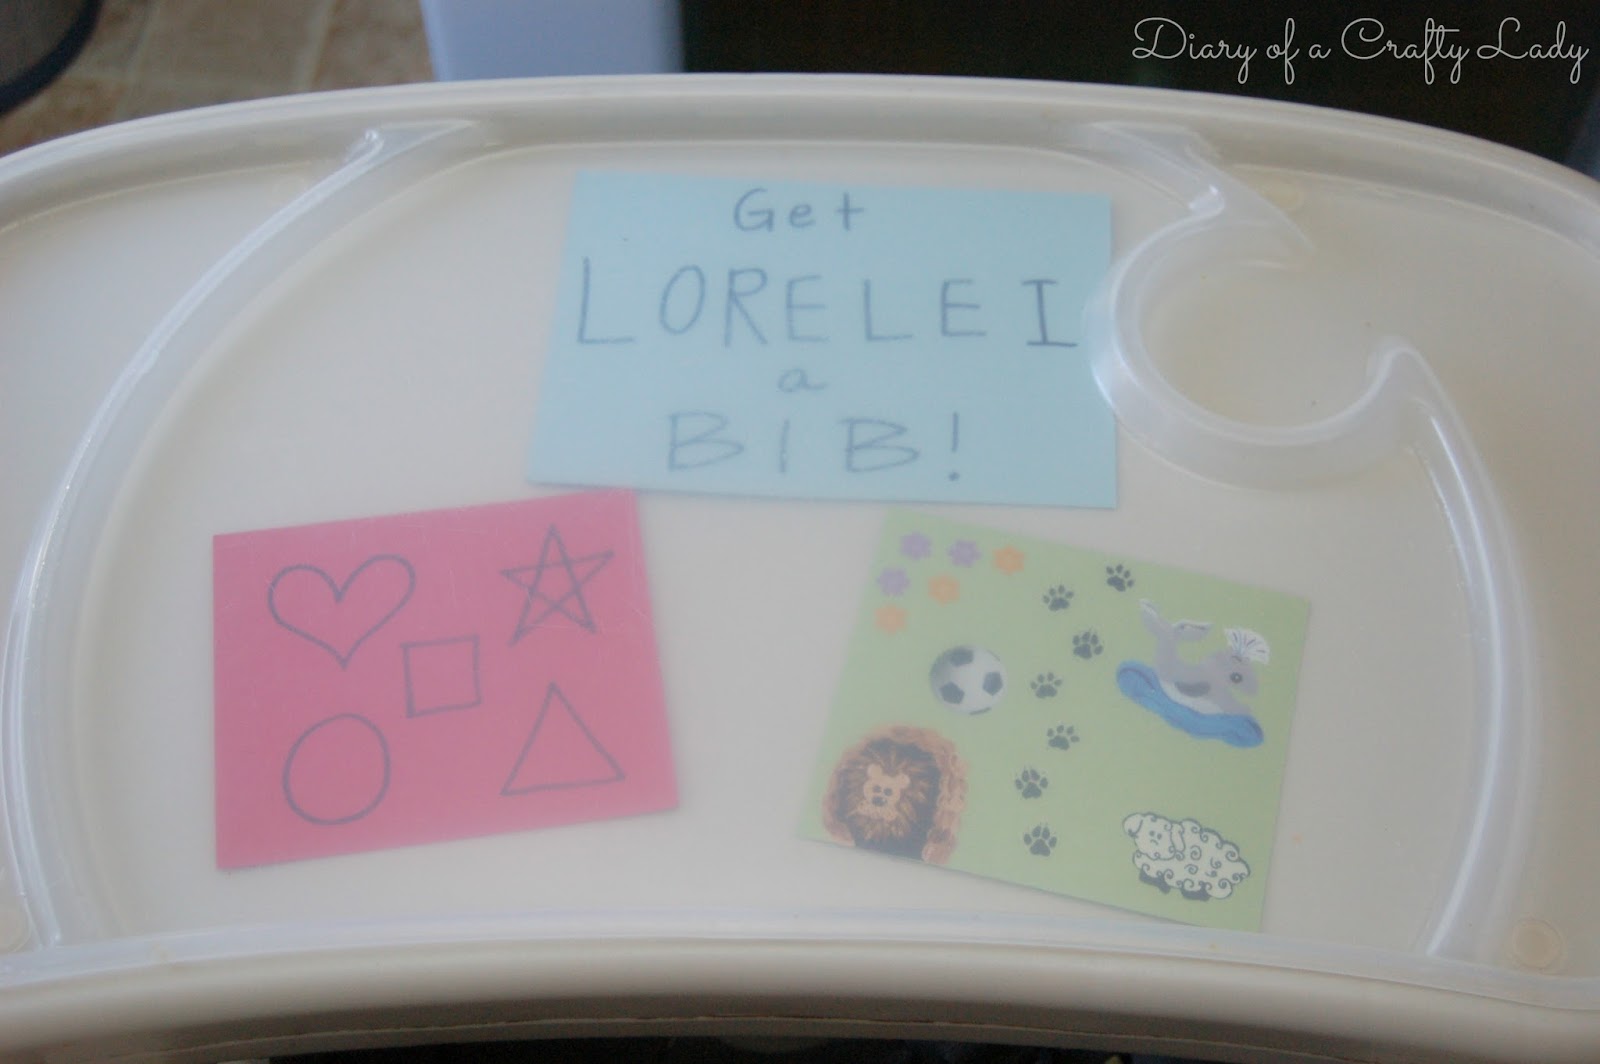
And just for a little added insurance...I stuck myself a note under the clear plastic high chair tray cover.   Along with some other pictures for baby to look at (which hello, why didn't I think of this before?!) I'm totally stoked. 


Here's to being creative, and getting more use out of those bibs!

image signature
Follow me on Facebook


September 2, 2013

Jam Start of Year Teacher Gift with FREE Printable!


My daughter starts school tomorrow, and we wanted to give her teacher and assistant teacher a little gift to start off the school year!  

Over the summer we have picked lots of fruit and made lots of freezer jam, and it is so delicious and colorful - it makes a wonderful gift!  I put peach and strawberry jam into cute little ball jars that I had, and made some fun tags to go along with.  

Here's a quick how-to:

Cut a piece of brown paper bag the same size as a sheet of paper, so that you can run it through your printer.  


Click on the image below to open up a word document with these different tags, all available to print.  You can delete the ones you don't want to print, but there are pictures of peaches, strawberries, blackberries, raspberries and blueberries....


Print the images onto the brown paper bag....


Cut the tags out, and hole punch them in the corner.


Use baker's twine, string, ribbon, raffia -- or whatever cute thing you've got -- to tie the tag to the ring of the jar.  I also had my daughter write a little message on the back of the tag, with her name.


My daughter is so excited for 1st grade to start, and to give her teachers a little present to let them know how much she has looked forward to being in their class.  Hope you have a chance to give a little jam appreciation gift to a teacher you know ;)  
And Happy School Year!

image signature
Follow me on Facebook